¶ Designing Roadmaps
Key Note: In Planally, creating a "project" can mean creating a contract, tender, research initiative, product, audit, or any other entity defined by your workflow. The steps below apply universally, but examples here use projects for clarity.
Roadmaps define the requirements of your workflow and what is automated when your team uses it. They organise phases and activities so that every project follows a structured process, ensuring consistency and automation when new projects are created.
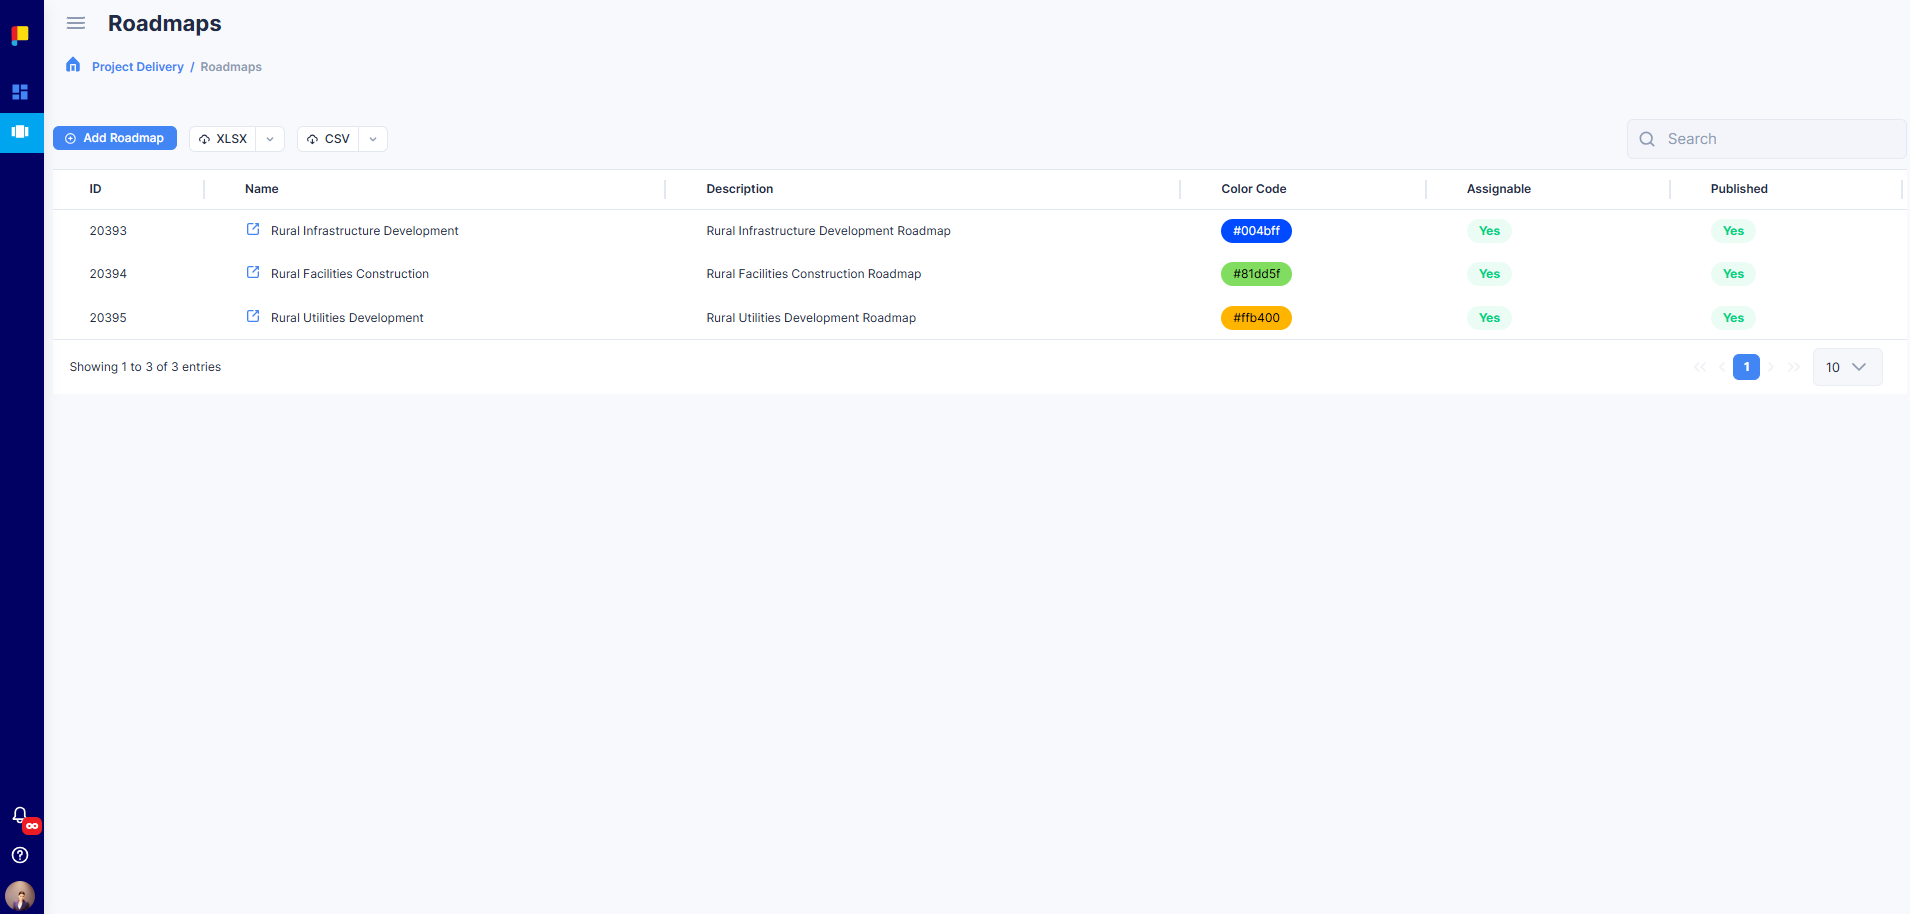
¶ Overview
A roadmap represents the sequence of phases and activities that make up your workflow. When you create a project, you select a roadmap to apply its structure automatically. This ensures:
- All projects follow a standardised process.
- Governance rules and activities are automated.
- Teams have clarity on what's needed at each phase.
To access the Roadmaps page: navigate to Workflow > Configuration > Projects > Roadmaps.
¶ Key Features
- Create Roadmaps: Define lifecycle phases for your workflow.
- Add Activities: Assign tasks and deliverables to phases.
- Update Activities: Adjust priority, permissions, and relationships.
- Publish Roadmaps: Make the roadmap active for new projects.
- Manage Applicability: Set activities as Mandatory, Prerequisite, or Applicable.
- Visualise Dependencies: Use Diagram View for complex workflows.
¶ Creating a Roadmap
¶ Steps
- Navigate to Workflow > Configuration > Projects > Roadmaps.
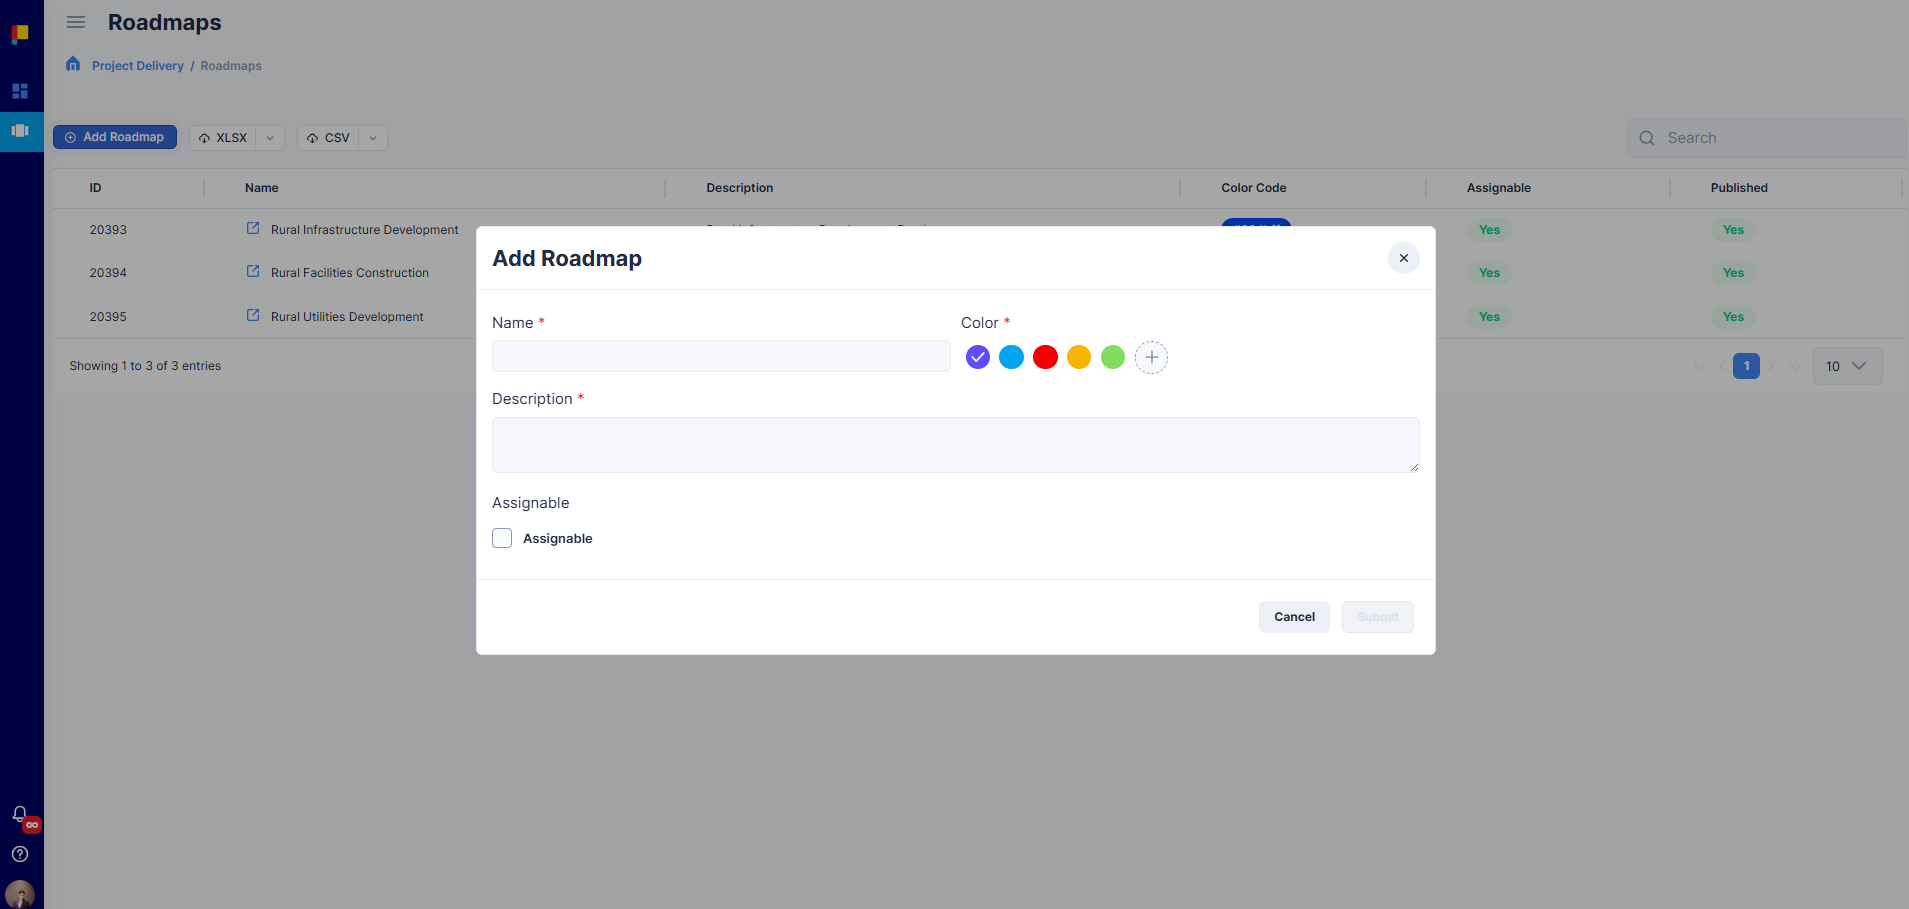
- Click Add Roadmap.
- Enter Name, Description, and Colour.
- Mark Assignable if you want this roadmap available for new projects.
- Click Save.
¶ Adding Activities to a Roadmap
Add activities to each phase using Table View (structured list) or Diagram View (visualises relationships).
¶ Steps to Add Activities
- Open the roadmap and select Table View or Diagram View.
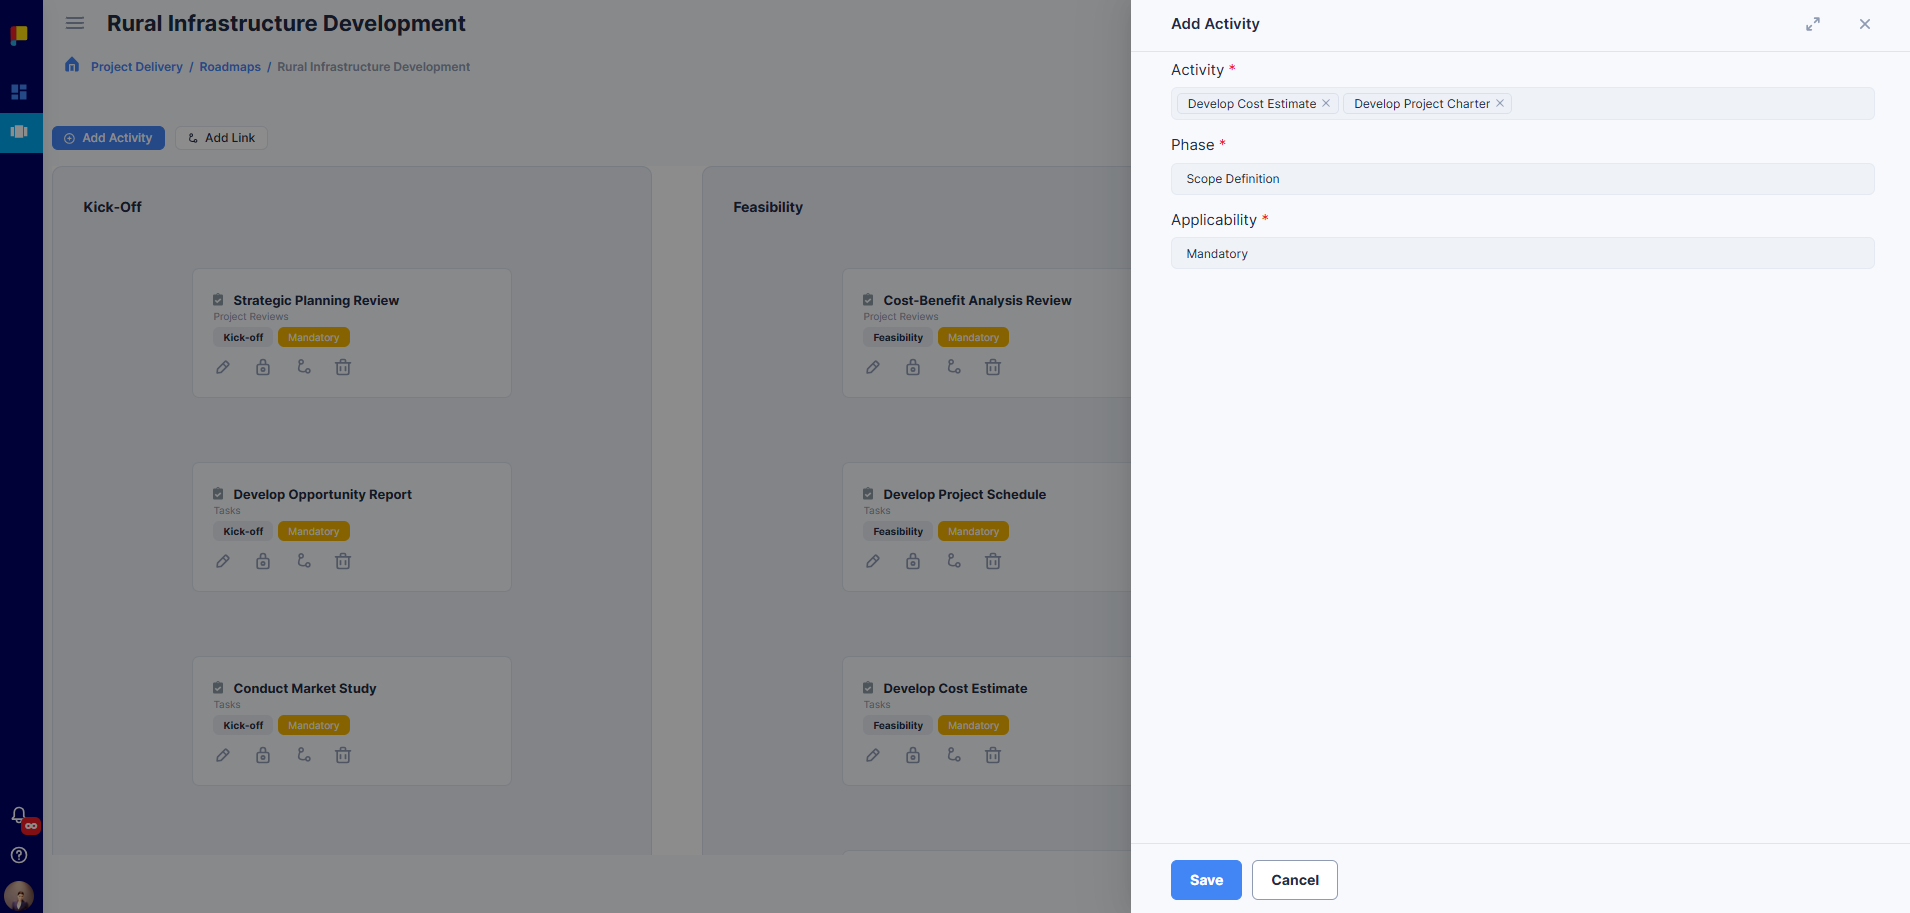
- Click Add Activity.
- Choose:
- Template (Form Builder template, Gate, or Generic activity)
- Phase (e.g. Initiation, Planning, Execution, Closing)
- Applicability: Mandatory (must be completed), Prerequisite (required before others), or Applicable (optional but relevant).
- Click Save.
¶ Updating Activities
¶ What You Can Update
- Priority — Adjust importance (determines the order activities appear).
- Permissions — Assign roles and define endorsement/approval policies for each status.
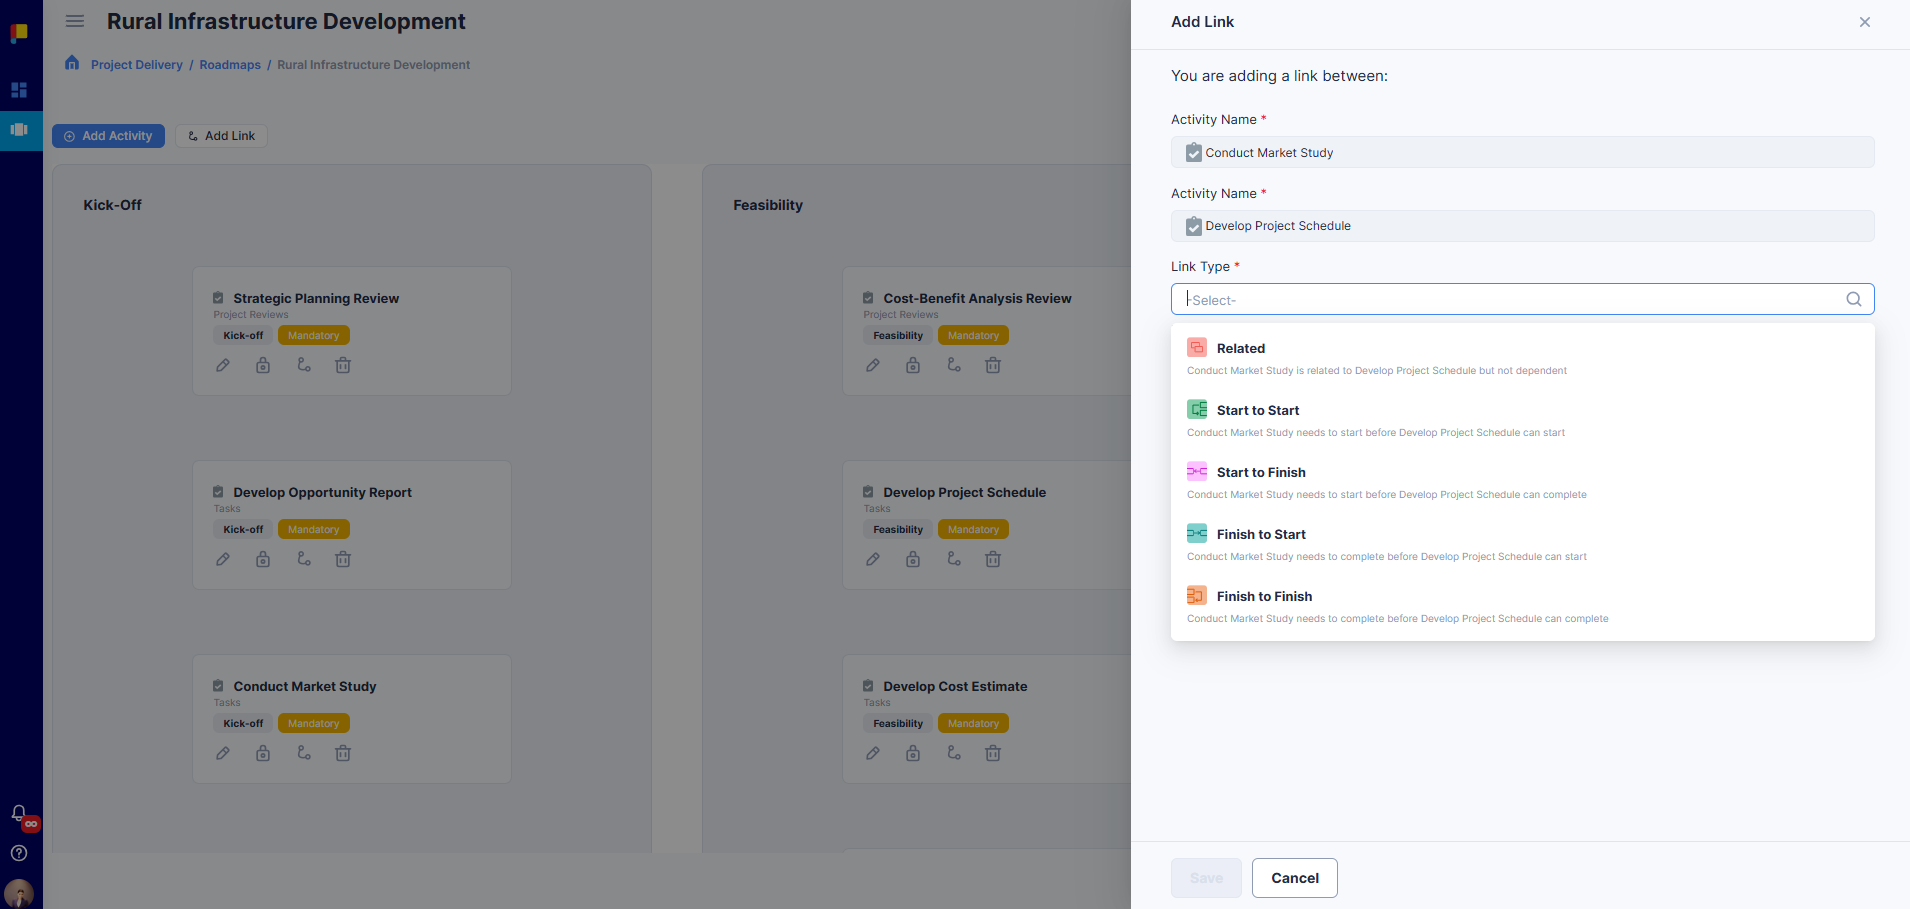
- Related Work — Link activities using Related, SS, FS, SF, or FF relationships; view in Table or Diagram view.
¶ Publishing a Roadmap
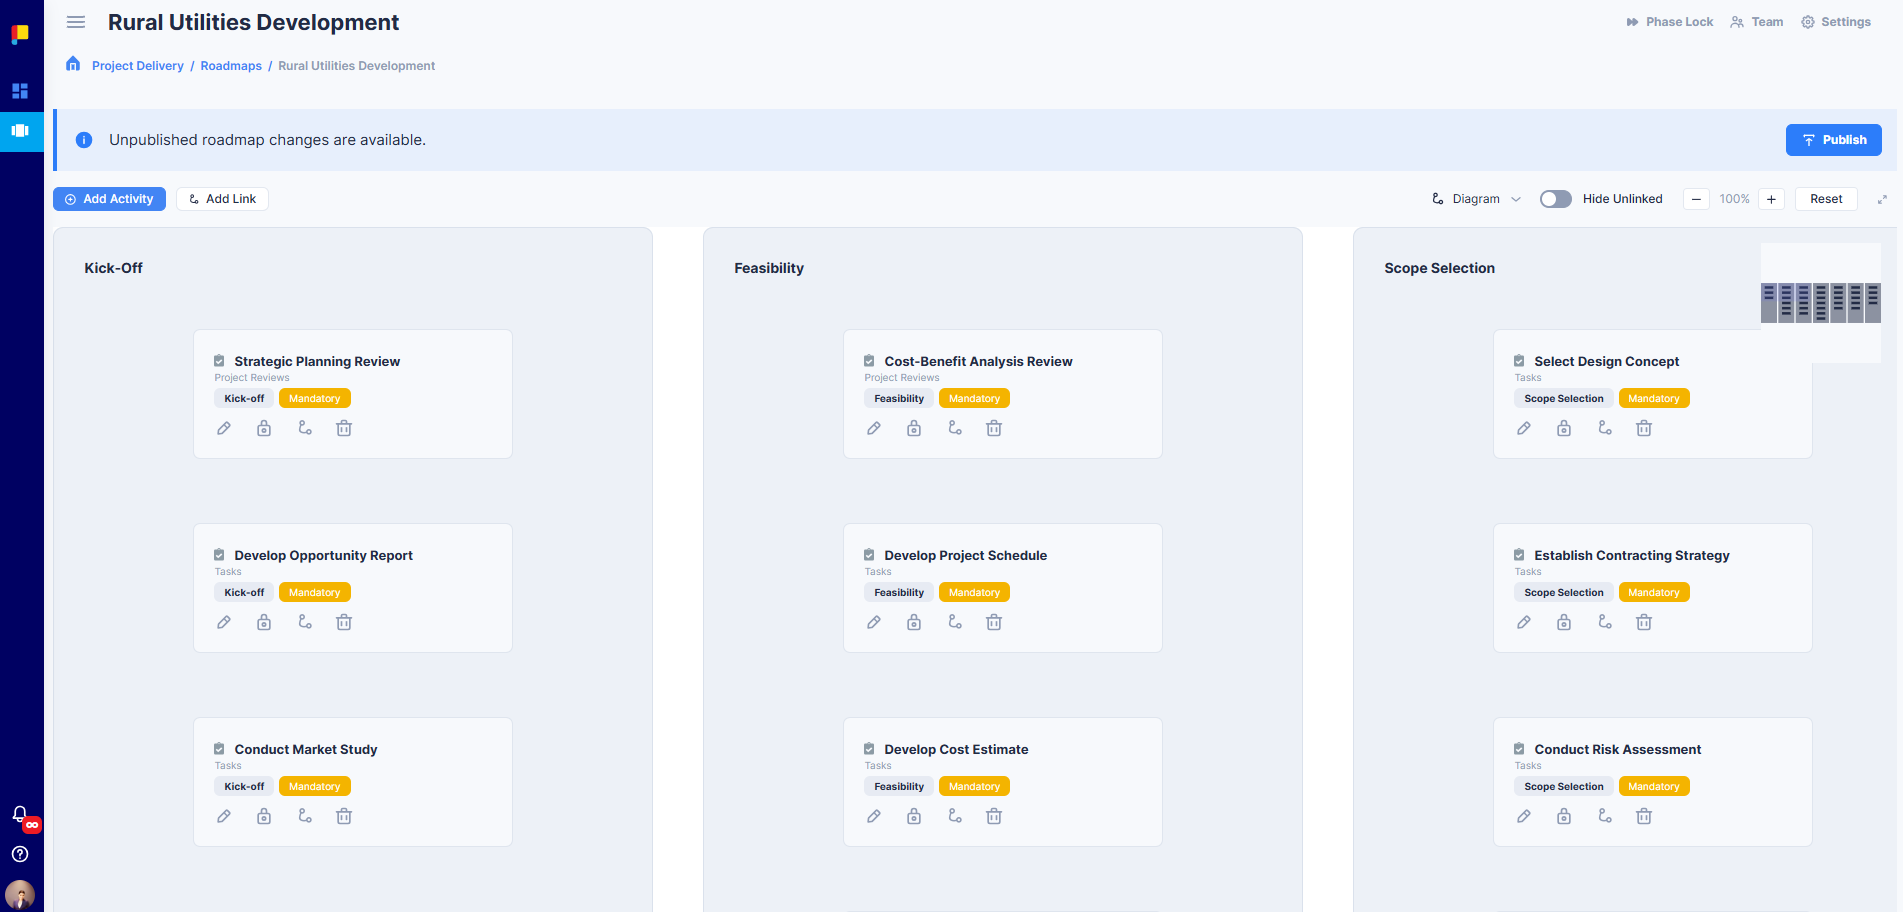
When you finish configuring a roadmap, publish it so it becomes active.
¶ Steps to Publish
- Open the roadmap.
- Click Publish.
- Confirm the action.
¶ What Happens After Publishing
- The roadmap is available for use in the workflow.
- Users can select it when creating new projects.
- Existing projects can update to the latest roadmap version—a notification appears in each project.
- Updates apply from the current phase onwards (previous phases remain unchanged).
¶ Deleting a Roadmap
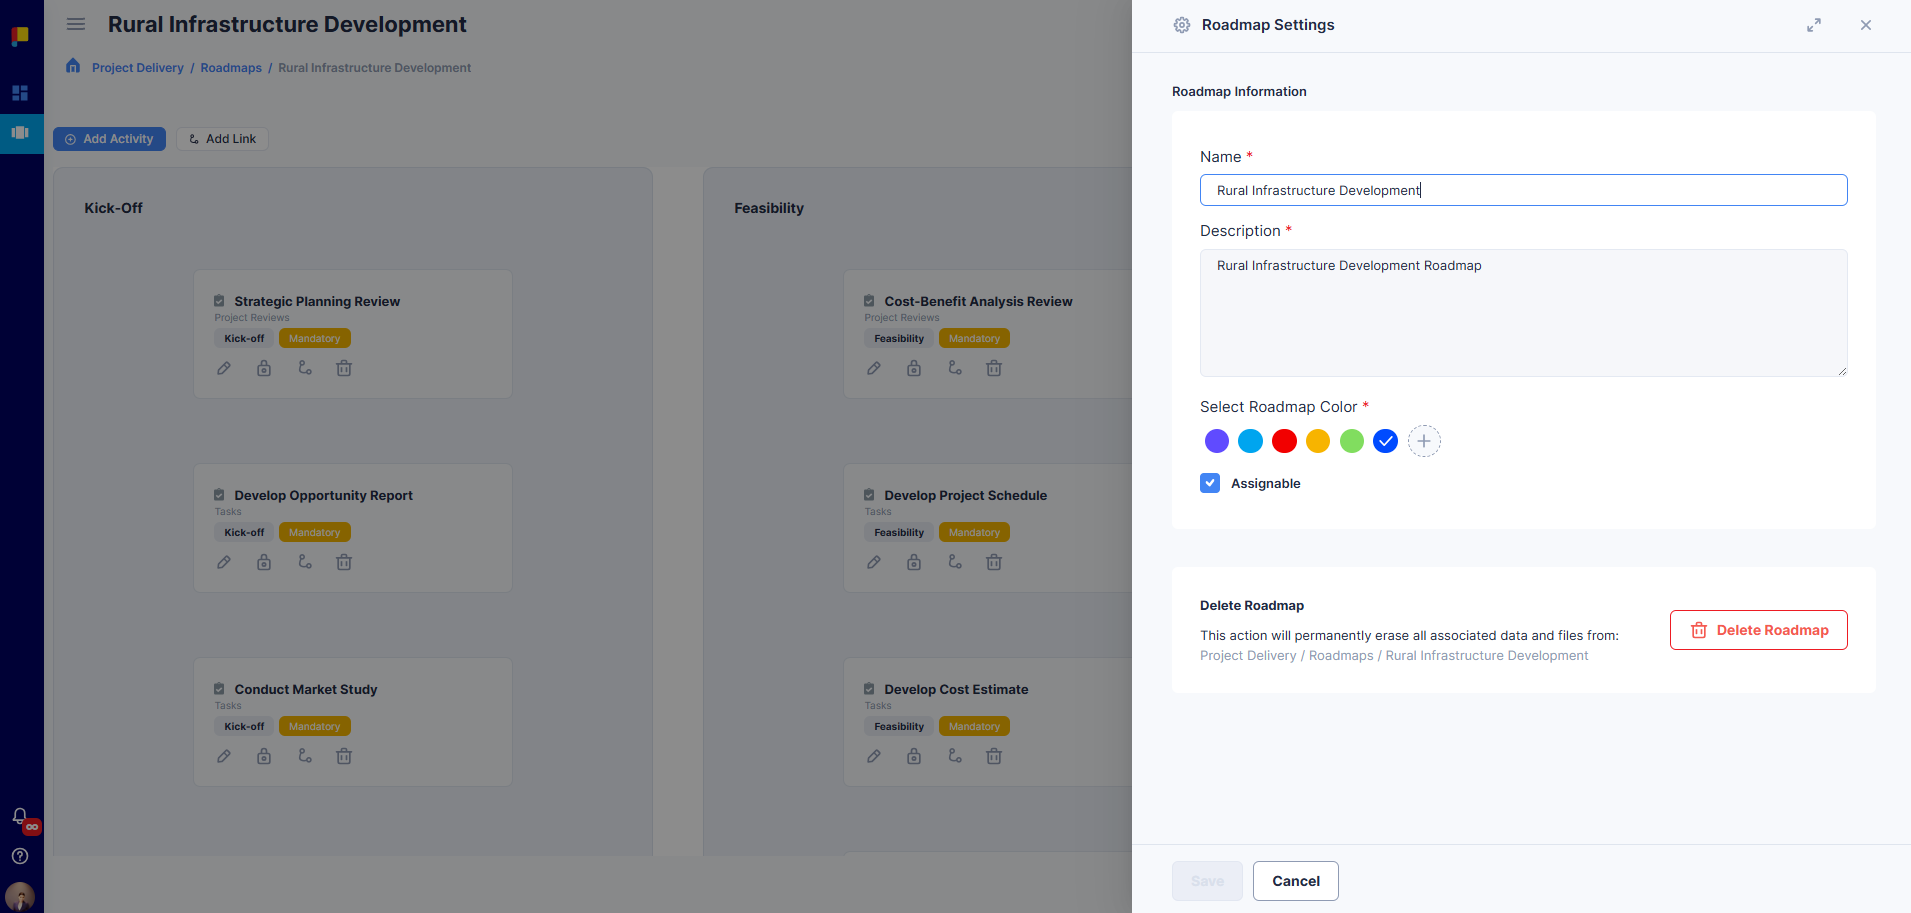
Deleting a roadmap removes it permanently and it cannot be recovered. Existing projects using it are affected. An alternative is to make it un-assignable so it's no longer available to users.
¶ Steps to Delete
- Open the roadmap.
- Click Settings.
- Click Delete Roadmap.
- Type DELETE in the confirmation box.
- Click Delete Roadmap.
¶ Best Practices
- Publish the roadmap only after all activities and phases are finalised.
- Communicate updates to project teams before applying changes.
- Use Diagram View for complex roadmaps to visualise dependencies.
- Define endorsement and approval policies early for governance.