¶ Workflow Builder – Templates, Swimlanes, & Activities
The Workflow Builder in Planally helps you design and organize the structure of your workflow. Activities are the building blocks of your workflow — they define the tasks and actions that need to be completed. To make workflows structured and reusable, Planally uses three key components:
- Templates: Define the structure of an activity.
- Swimlanes: Organize activities into logical lanes.
- Activities: Add tasks to your workflow using templates.
Activities can then be added to your Roadmaps to be automated for your teams utilising your workflow. These components are crucial in establishing the requirements of the workflow and the data that needs to be captured, ensuring clarity, governance, and automation across your organisation.
¶ Overview
Creating activities in Planally involves three steps:
-
Create Templates
- Templates define the structure of an activity.
- You can use a Generic or Gate template, or build a custom form using the Form Builder.
-
Create Swimlanes
- Swimlanes categorize activities into logical lanes (e.g., Design, Procurement, QA).
-
Add Activities
- Activities are created using templates and assigned to swimlanes.
- You can also add details like Purpose and Reference Documents for governance.
The sections below explain how to complete each step.
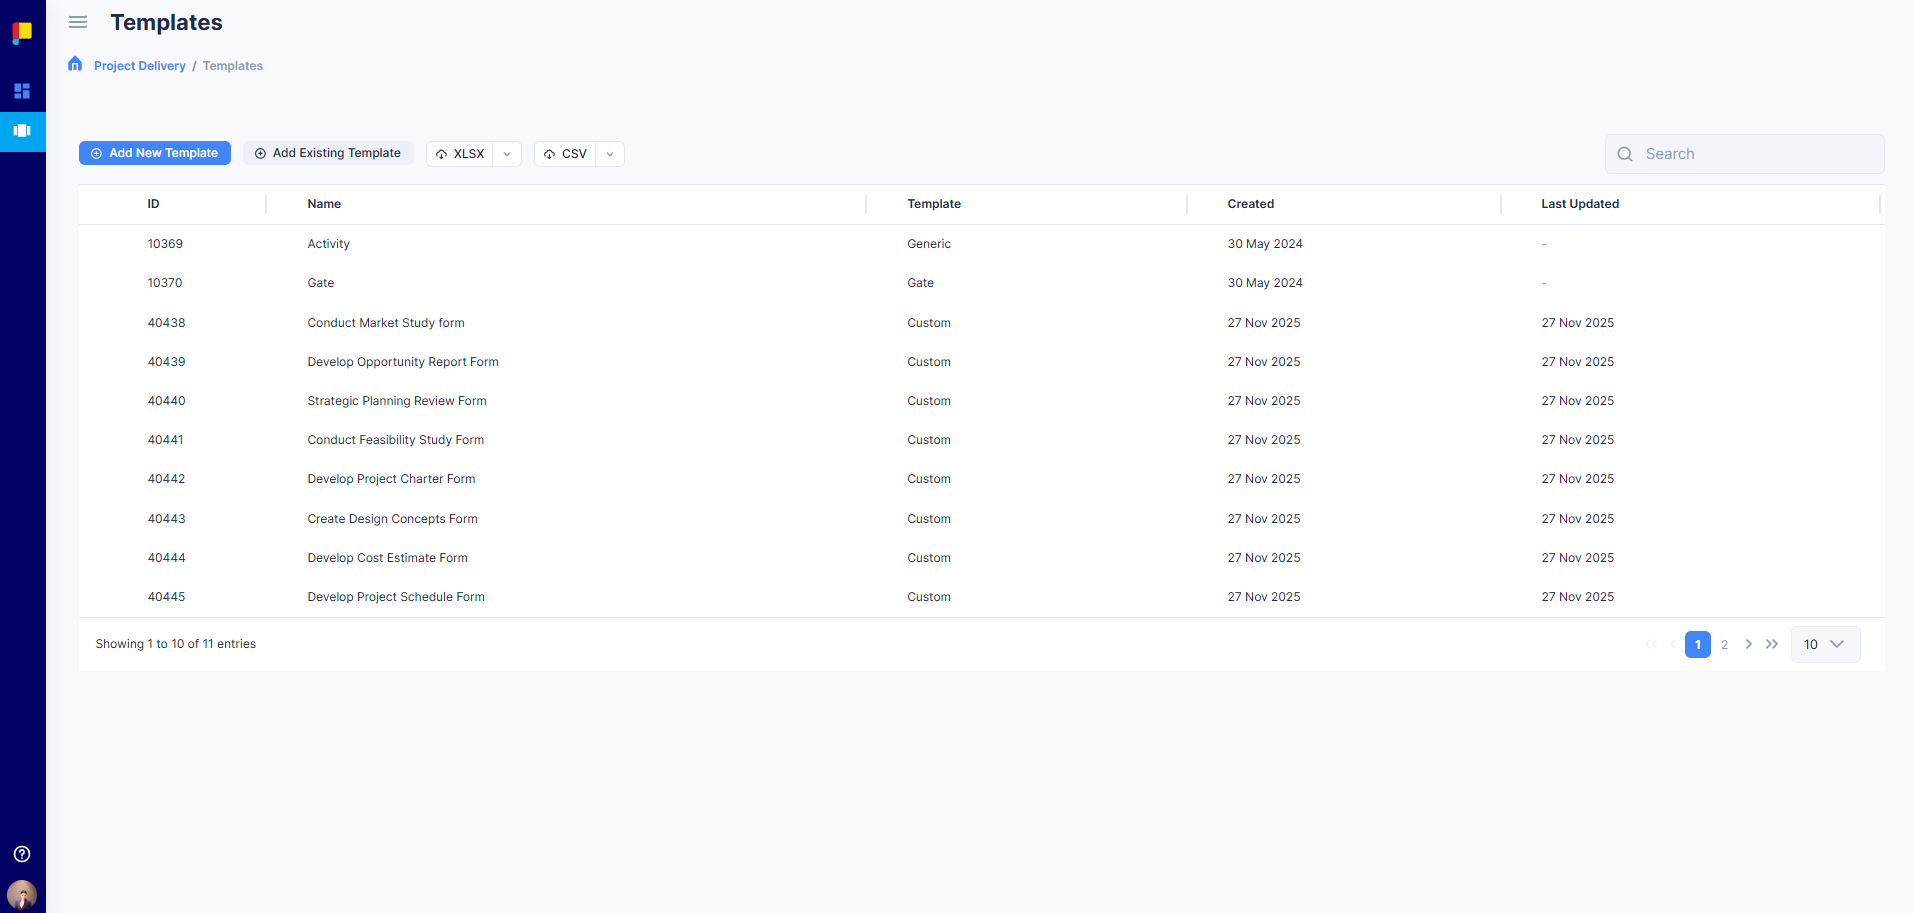
¶ 1. Templates
Templates are blueprints for activities. Every activity in a workflow is based on a template. The template defines the form that users see when completing activities.
- Customizable: Form Builder allows drag-and-drop field creation.
- Standardized: Standardizes data capture for compliance.
When creating templates, you can either create a new template or add an existing one.
¶ Types of Templates
- Existing Templates
- Generic: A simple activity without a form.
- Gate: A predefined template used to create Gate activities which become activity decision-points for a particular phase.
- Form-Builder Templates: Created using the Form Builder for custom data capture.
¶ Steps to Add an Existing Template
- Go to Workflow Builder > Templates.
- Click Add Existing Template and enter a name.
- Select the Template (e.g. Generic or Gate).
- Click Save to add it to your workflow.
¶ Steps to Create a New Template with Form Builder
- Go to Workflow Builder > Templates.
- Click Add New Template and enter a name.
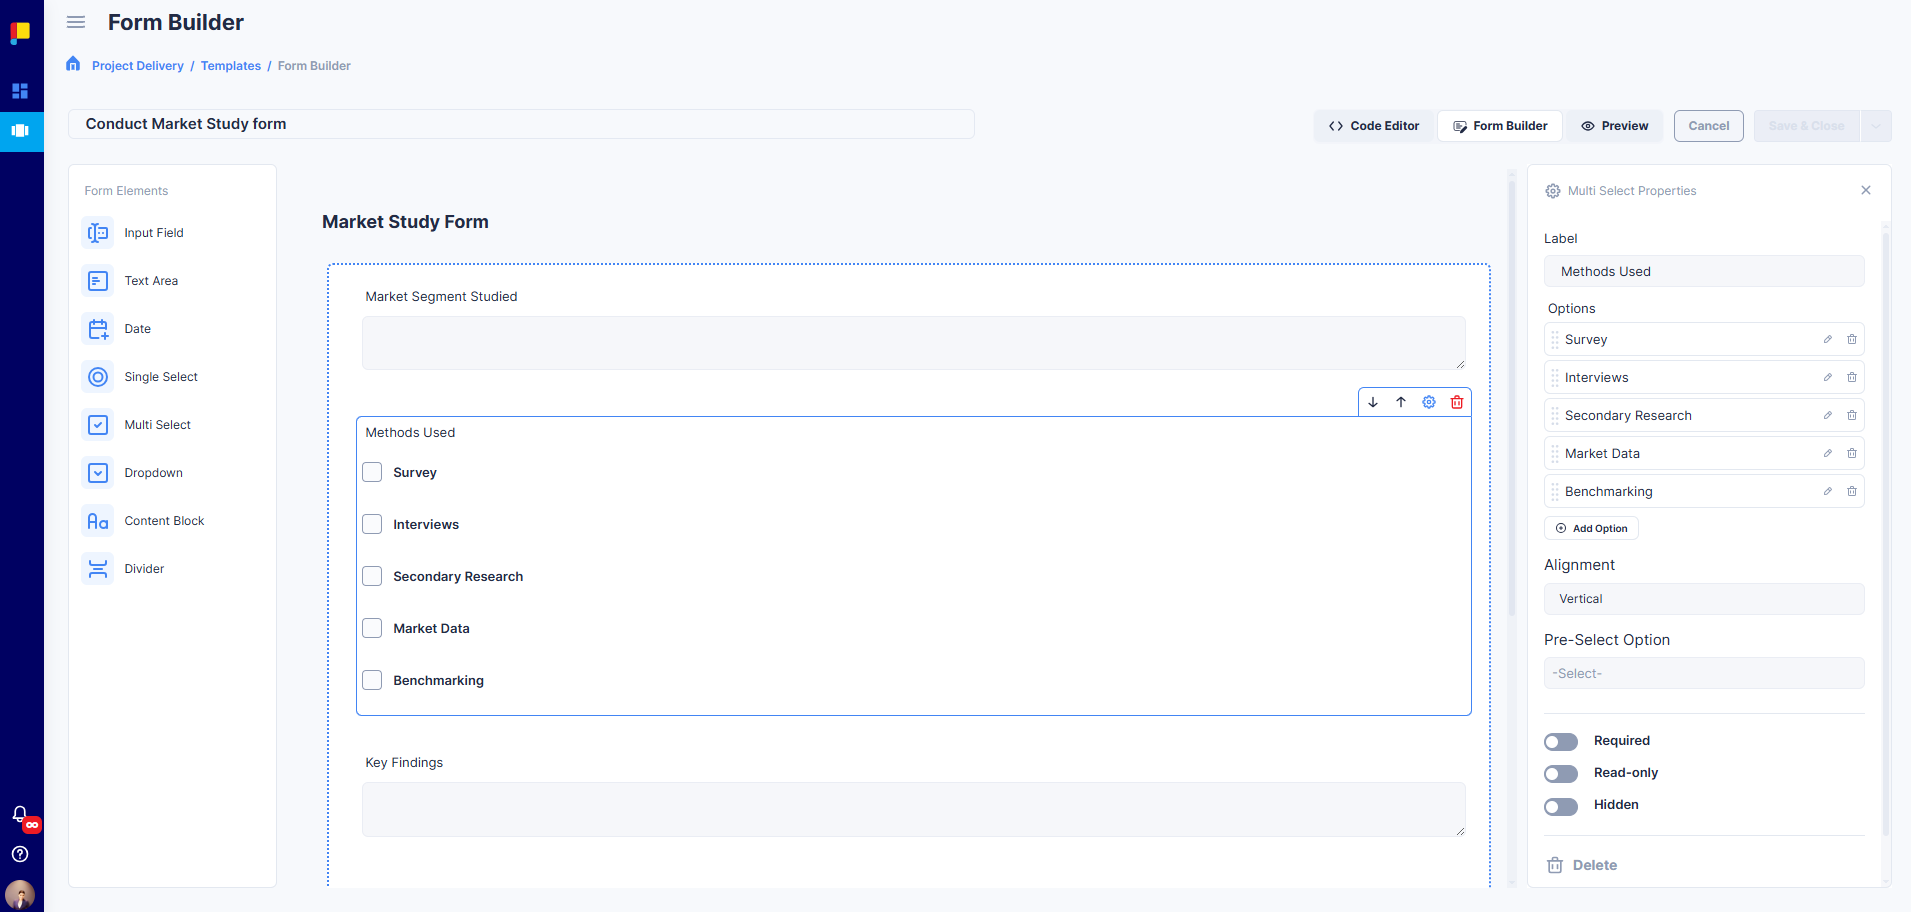
- Use the Form Builder to design your form:
¶ Drag and Drop Fields
Add elements such as:
- Text Field: For short text input (e.g., names, codes).
- Text Area: For longer descriptions or notes.
- Date Picker: For selecting dates (planned or actual).
- Dropdown: For single-choice lists.
- Multi Select: For multiple-choice options.
- Checkbox: For yes/no or binary options.
¶ Configure Field Properties
- Label: The name displayed to users.
- Placeholder: Example text shown inside the field.
- Required: Make the field mandatory.
- Read-only: Lock the field for viewing only.
- Visibility Rules: Show or hide fields based on conditions.
¶ Organize Sections
- Add Sections and Dividers to group related fields.
- Use these groupings for clarity for users when completing the form (e.g., “Project Details”, “Compliance Info”).
¶ Advanced Options
- Pre-select default values for dropdowns.
- Add validation rules (e.g., date must be after today).
- Click Save & Close to make it reusable across workflows.
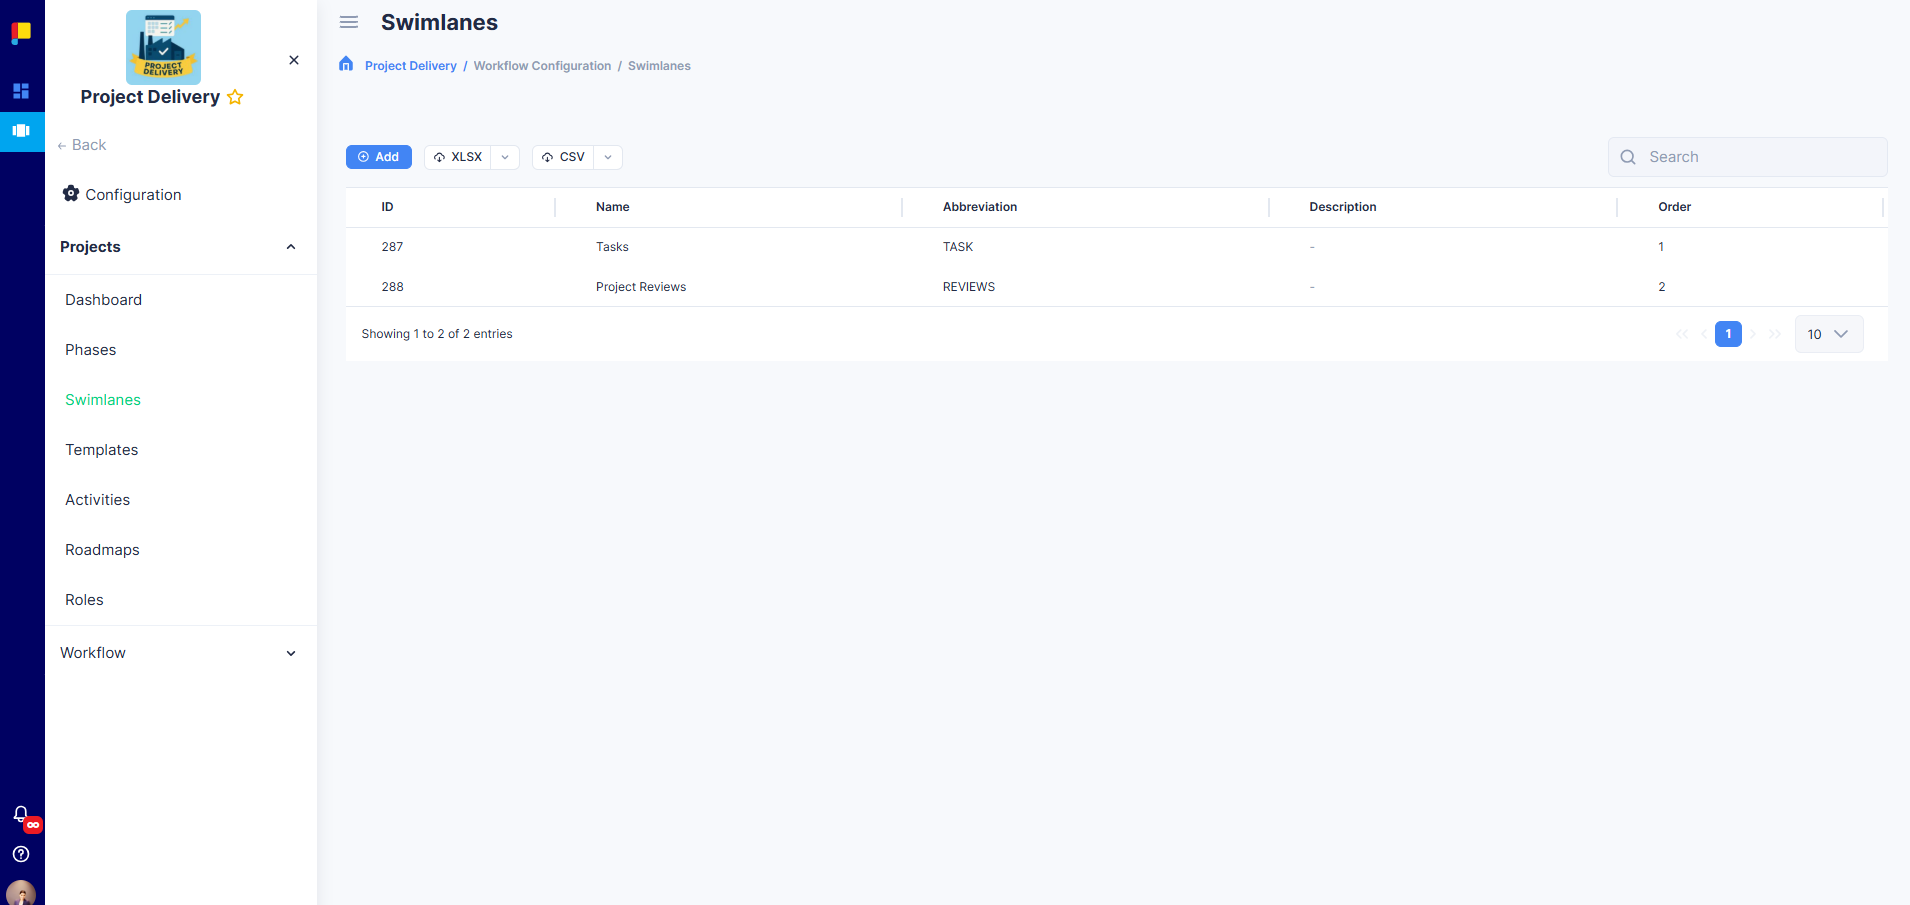
¶ 2. Swimlanes
Swimlanes help you organize activities visually within your workflow. They group activities by category, team, or phase, making complex workflows easier to manage.
¶ Key Features
- Visual Organisation: Activities grouped by logical lanes.
- Custom Naming: Define names and abbreviations for clarity.
- Flexible Structure: Add as many swimlanes as needed.
¶ Steps to Create Swimlanes
- Go to Workflow Builder > Swimlanes.
- Click Add Swimlane.
- Enter a name (e.g., Design, Procurement, QA).
- Add an abbreviation.
- Save changes.
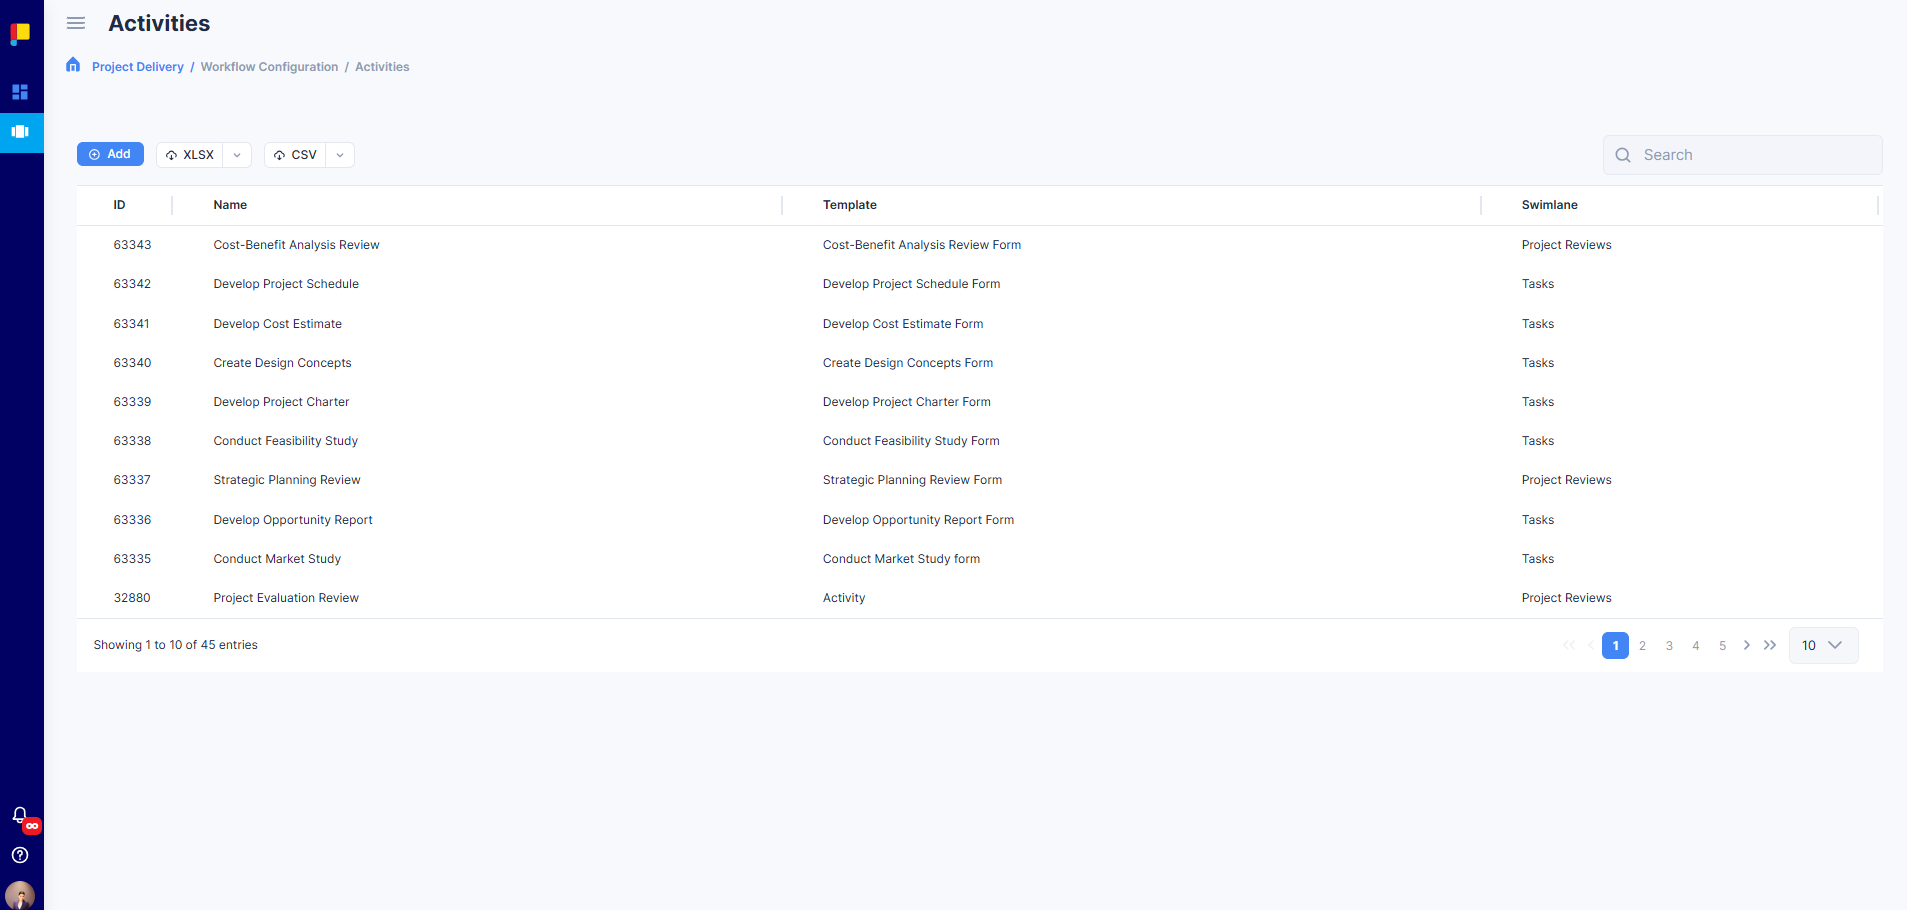
¶ 3. Activities
Activities are the actionable tasks in your workflow. Each activity:
- Is based on a template.
- Is assigned to a swimlane.
- Can be added to roadmaps for automation.
- Can be added to projects.
¶ Key Features
- Template-driven: Ensures consistency and compliance.
- Linked to Swimlanes: Keeps workflows organized.
- Supports Automation: Add to roadmaps for project-level automation.
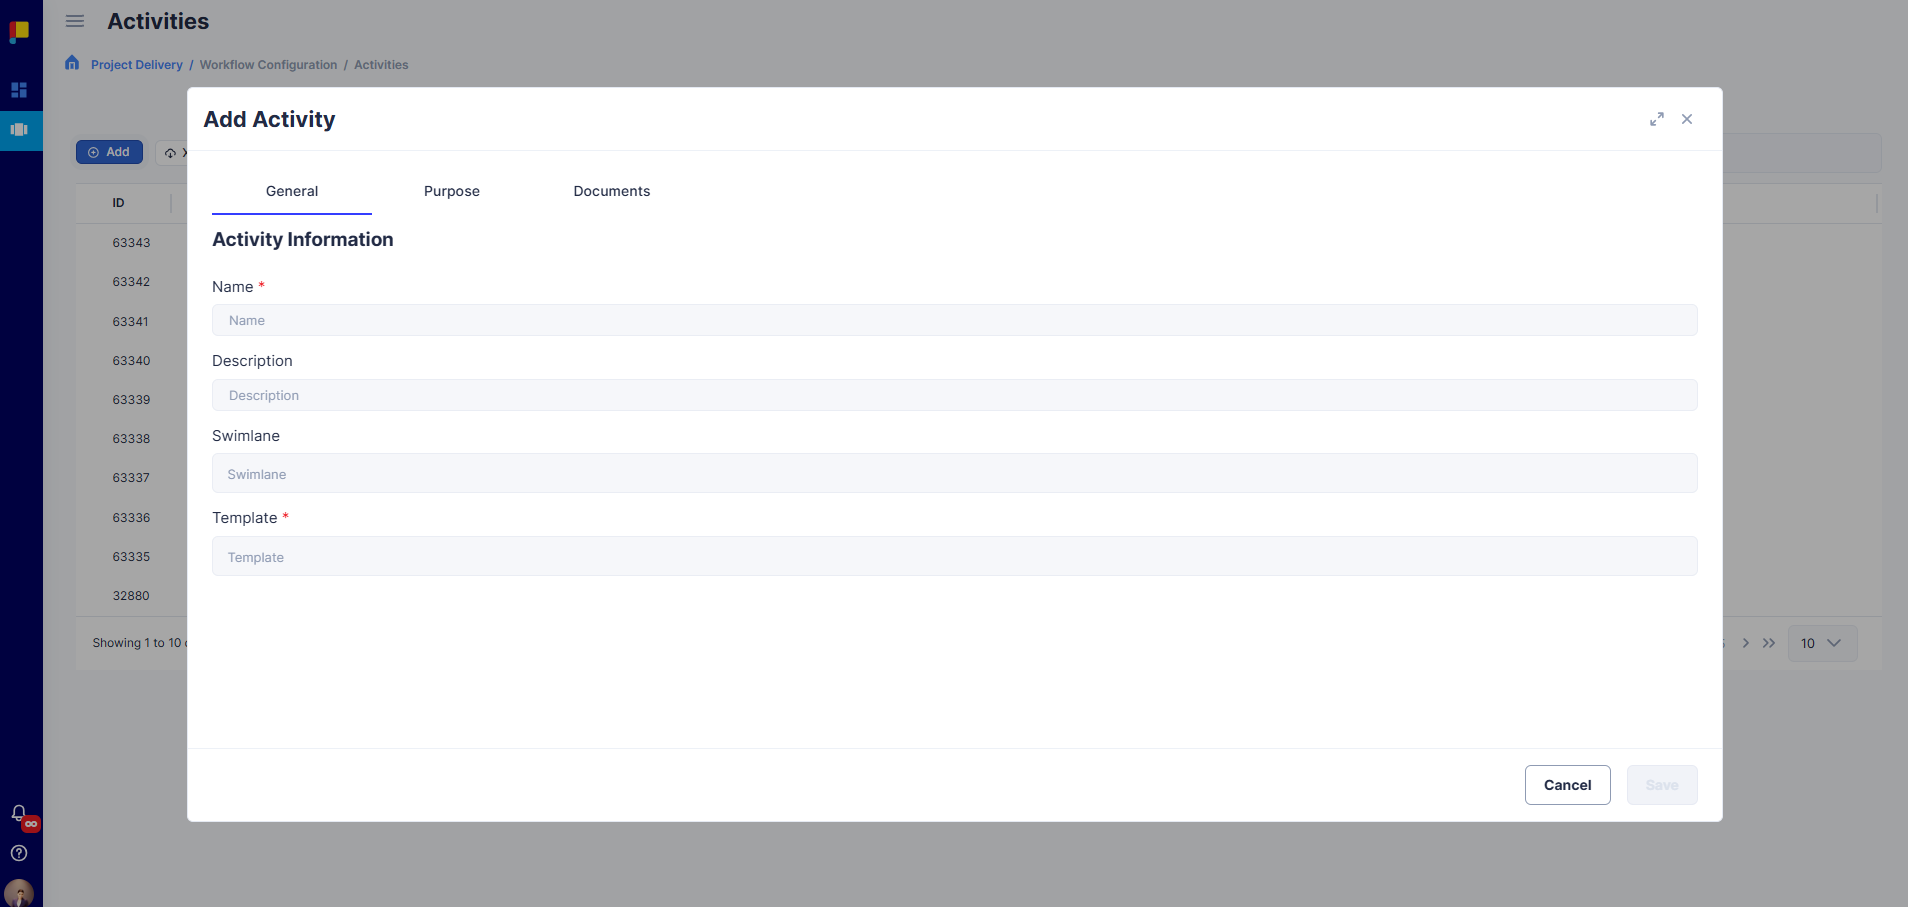
¶ Steps to Add Activities
- Go to Workflow Builder > Activities.
- Click Add Activity.
- Select a Template.
- Assign the activity to a Swimlane.
- Add details like name and description.
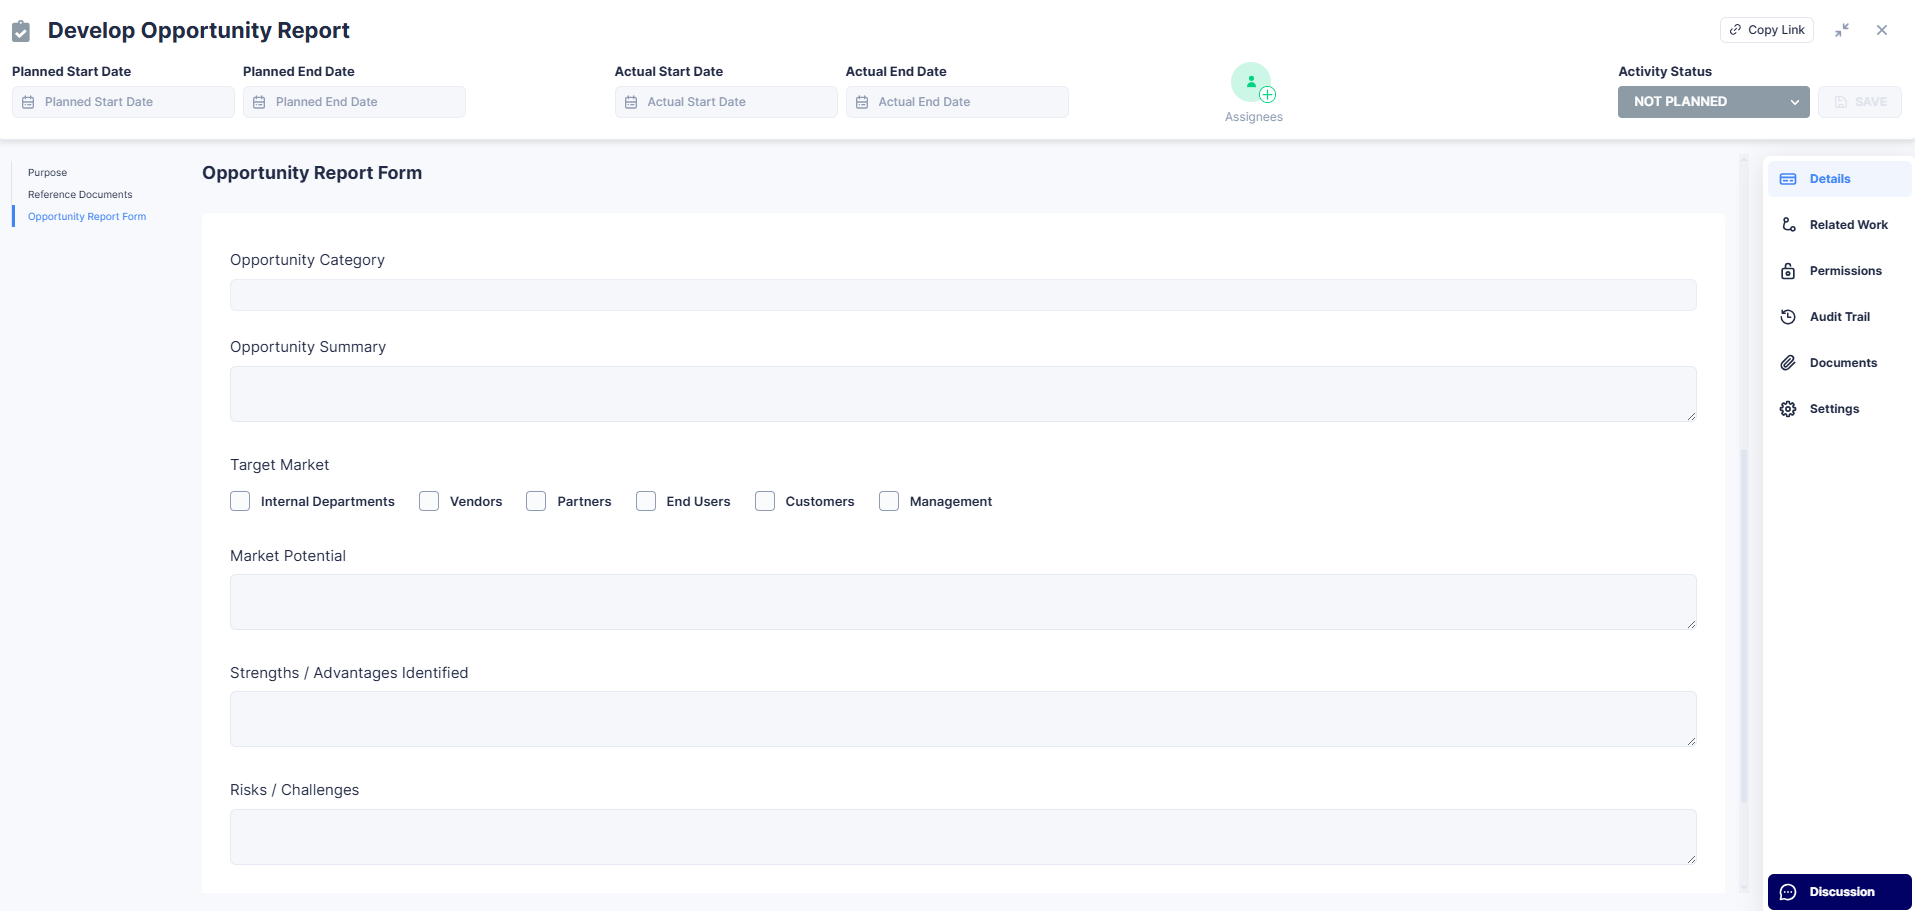
- Optionally add Purpose and Reference Documents for governance.
- Save the activity.
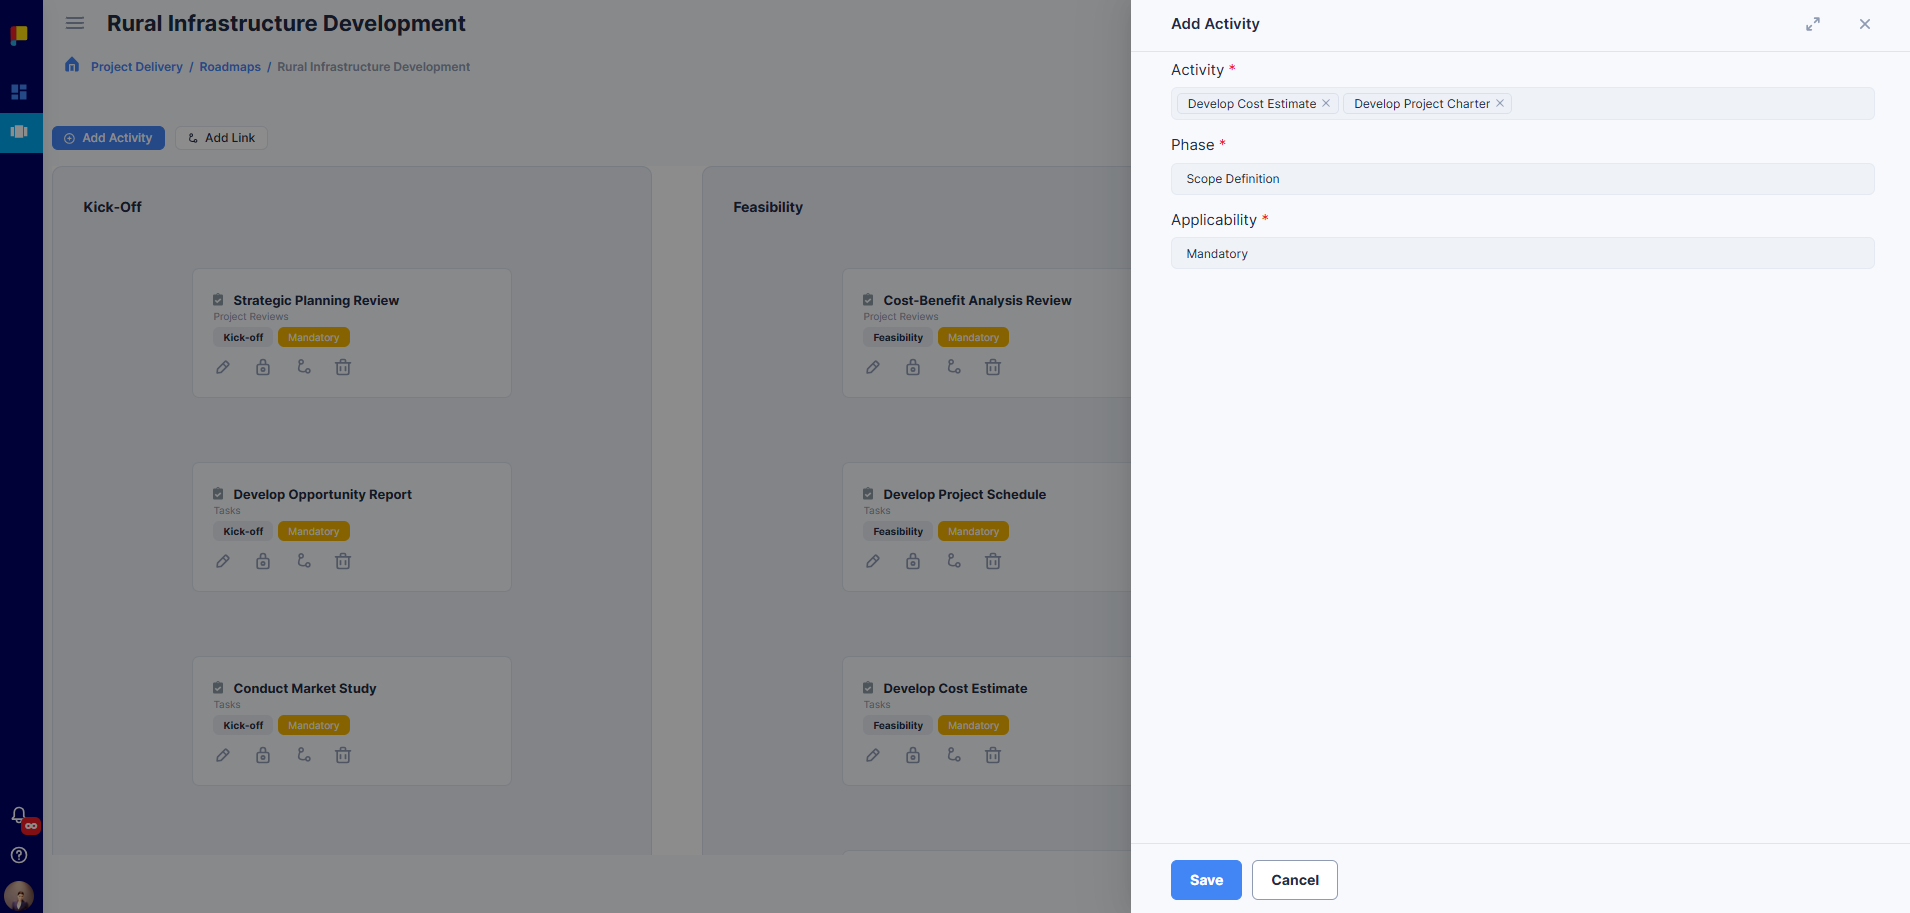
¶ What Happens Next
- Activities can be added to Roadmaps for automation when projects are created.
- Activities can also be added ad-hoc to projects later.
¶ Best Practices
- Create templates first for consistency.
- Use swimlanes to keep activities organized.
- Add activities to roadmaps for automation.
- Keep activity names clear and simple.
- Preview and check your form templates before publishing.