¶ Creating Projects
Key Note: In Planally, creating a "project" can mean creating a contract, tender, research initiative, product, audit, or any other entity defined by your workflow. The steps below apply universally, but examples here use projects for clarity.
¶ Overview
Projects are where execution happens in Planally. When you create a project, the selected roadmap automatically applies structure—phases, activities, roles, and governance rules—so work starts governed from day one. Your project starts with a fully automated workflow that includes:
- Phases: Lifecycle stages defined by the roadmap.
- Activities: Tasks and deliverables within each phase.
- Team: Roles and permissions for governance.
- Settings: Controls project visibility, roadmap, and phase management.
To start working on a project:
- Complete the activities assigned to the phase.
- Add additional activities if needed.
- Reach a decision point (gate) where you decide to Go (advance), No-Go (stop), or Recycle (return to a previous phase).
¶ Key Features
- Create Projects: Add new projects within a workflow.
- Roadmap Automation: Select from available roadmaps to structure activities and governance requirements.
- Accessibility: Define whether the project is Public or Private.
- Tags: Add tags for categorisation and search.
- Manage Team: Control access via the Access Table, and manage roles via Roles (Table or Chart view).
- Manage Settings: Update project details, current phase, status, roadmap, and other attributes.
- Delete Project: Permanently remove a project following confirmation rules.
¶ Creating Projects
You can create a project from the Project List page or the Create Project page within a workflow.
¶ Steps
- Navigate to your Project List page.
- Click Add Project.
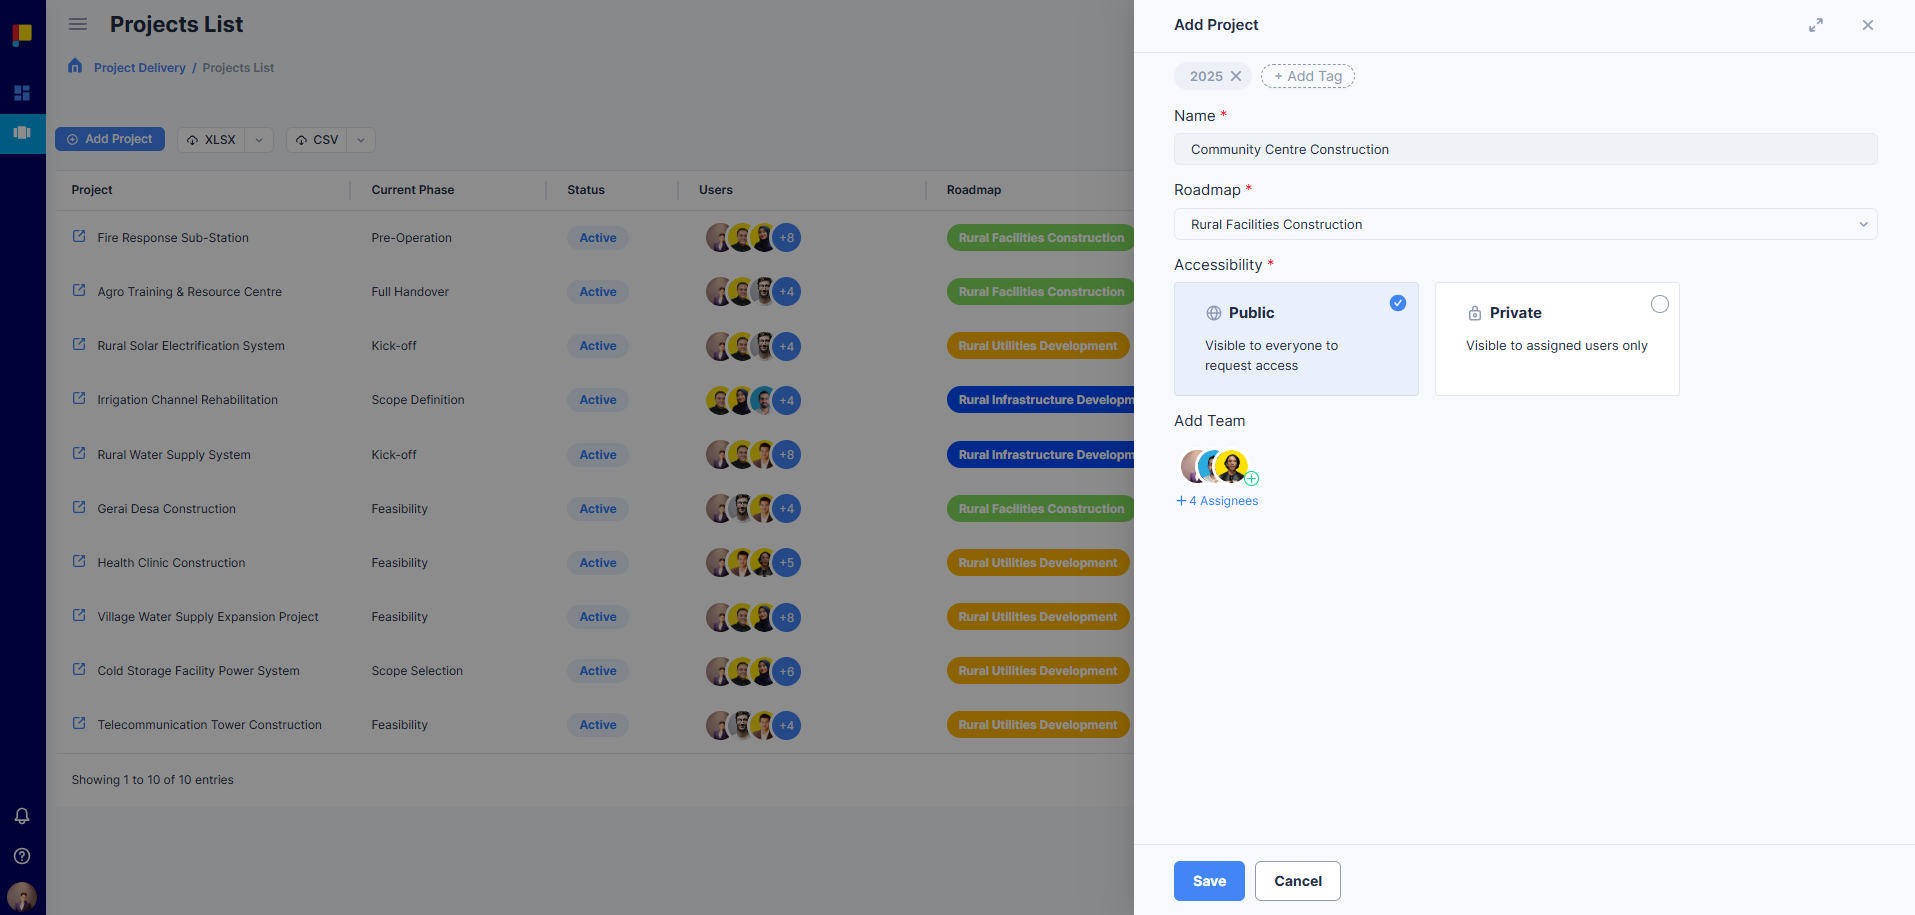
- Complete the fields:
- Name: Enter a descriptive name.
- Roadmap: Select from available options (e.g. Major, Medium, Minor).
- Accessibility:
- Public: Project name is visible to all users; access requests go to Key Role users and System Administrators.
- Private: Only visible to assigned users.
- Tags: Add relevant tags for easy filtering.
- Click Save to create the project.
Once created, the workflow is automated with phases, activities, and governance rules. You can immediately begin completing activities and navigating through Workflow Views.
¶ Manage Team
Team lets you update access to your project and manage the roles involved via Roles (table or chart view).
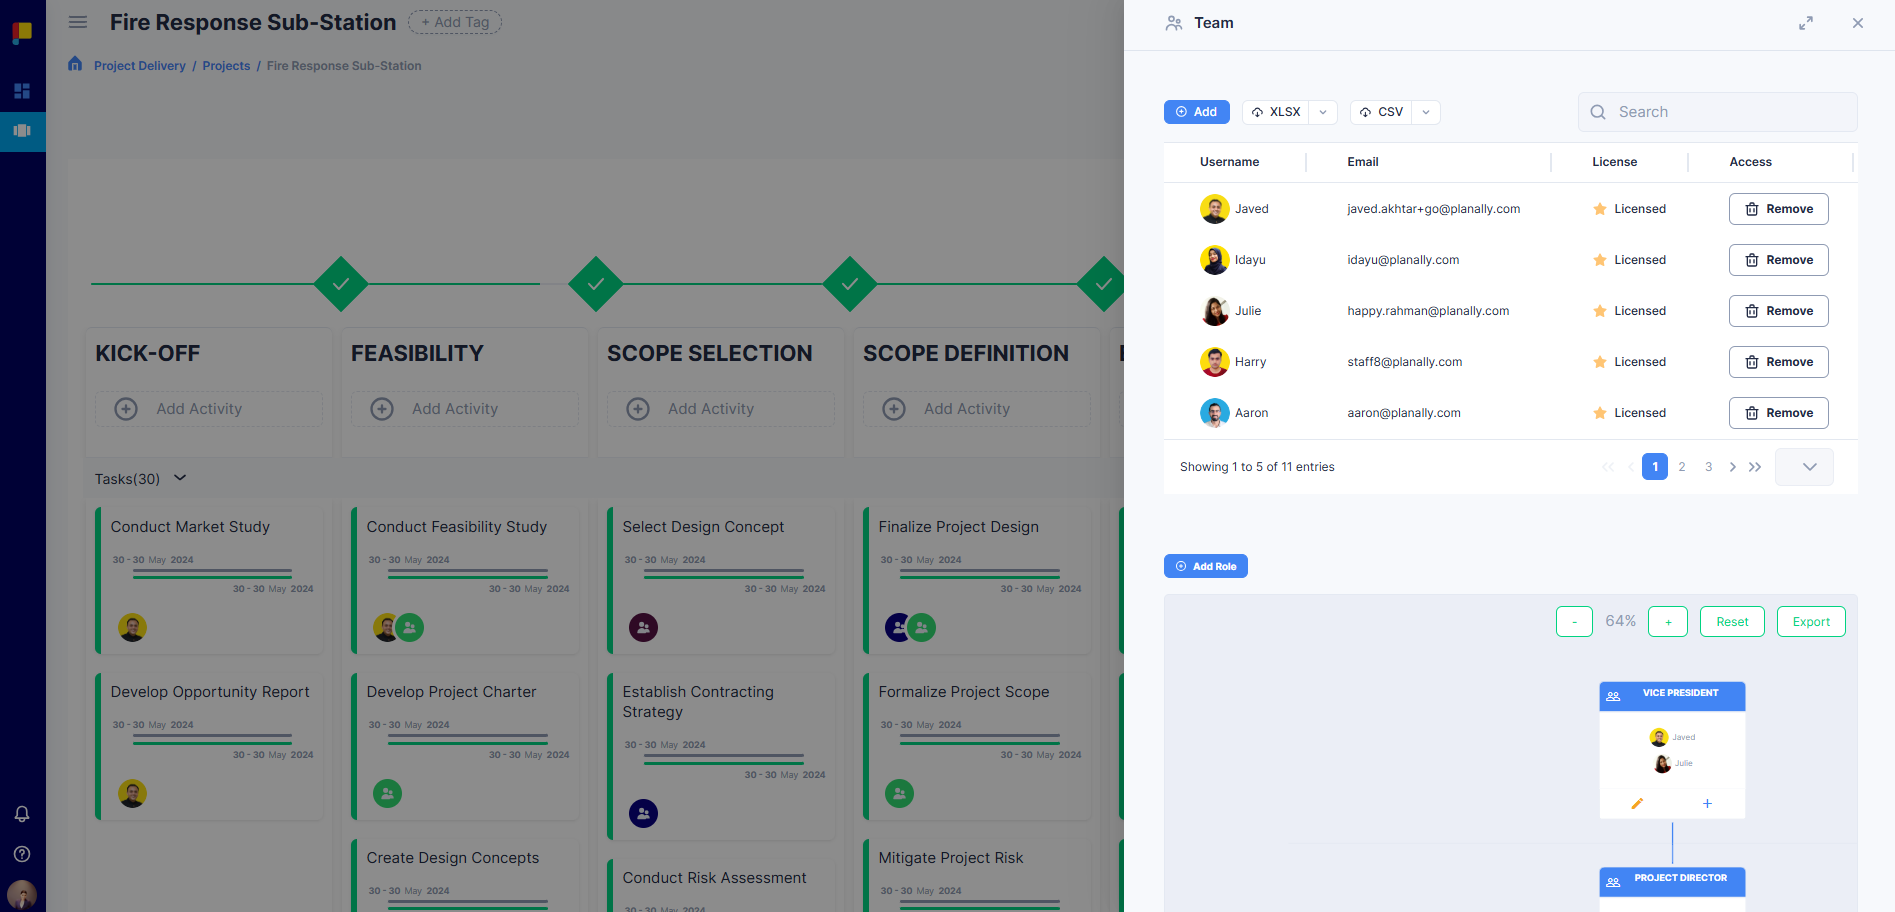
¶ Access Table
- Displays all users with access to the project.
- You can add/remove users here.
- Assigned users will receive notifications.
Steps
- Go to Team > Access.
- Click Add User.
- Select from the user list.
- Save.
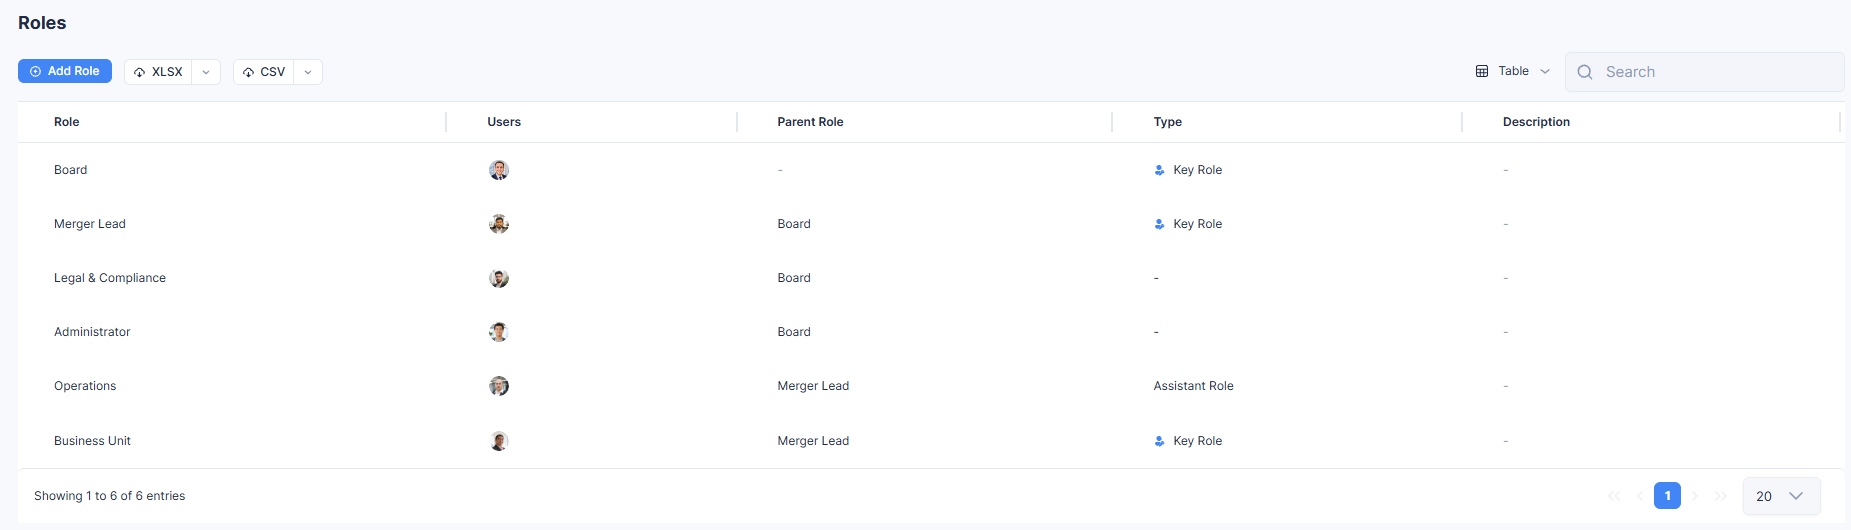
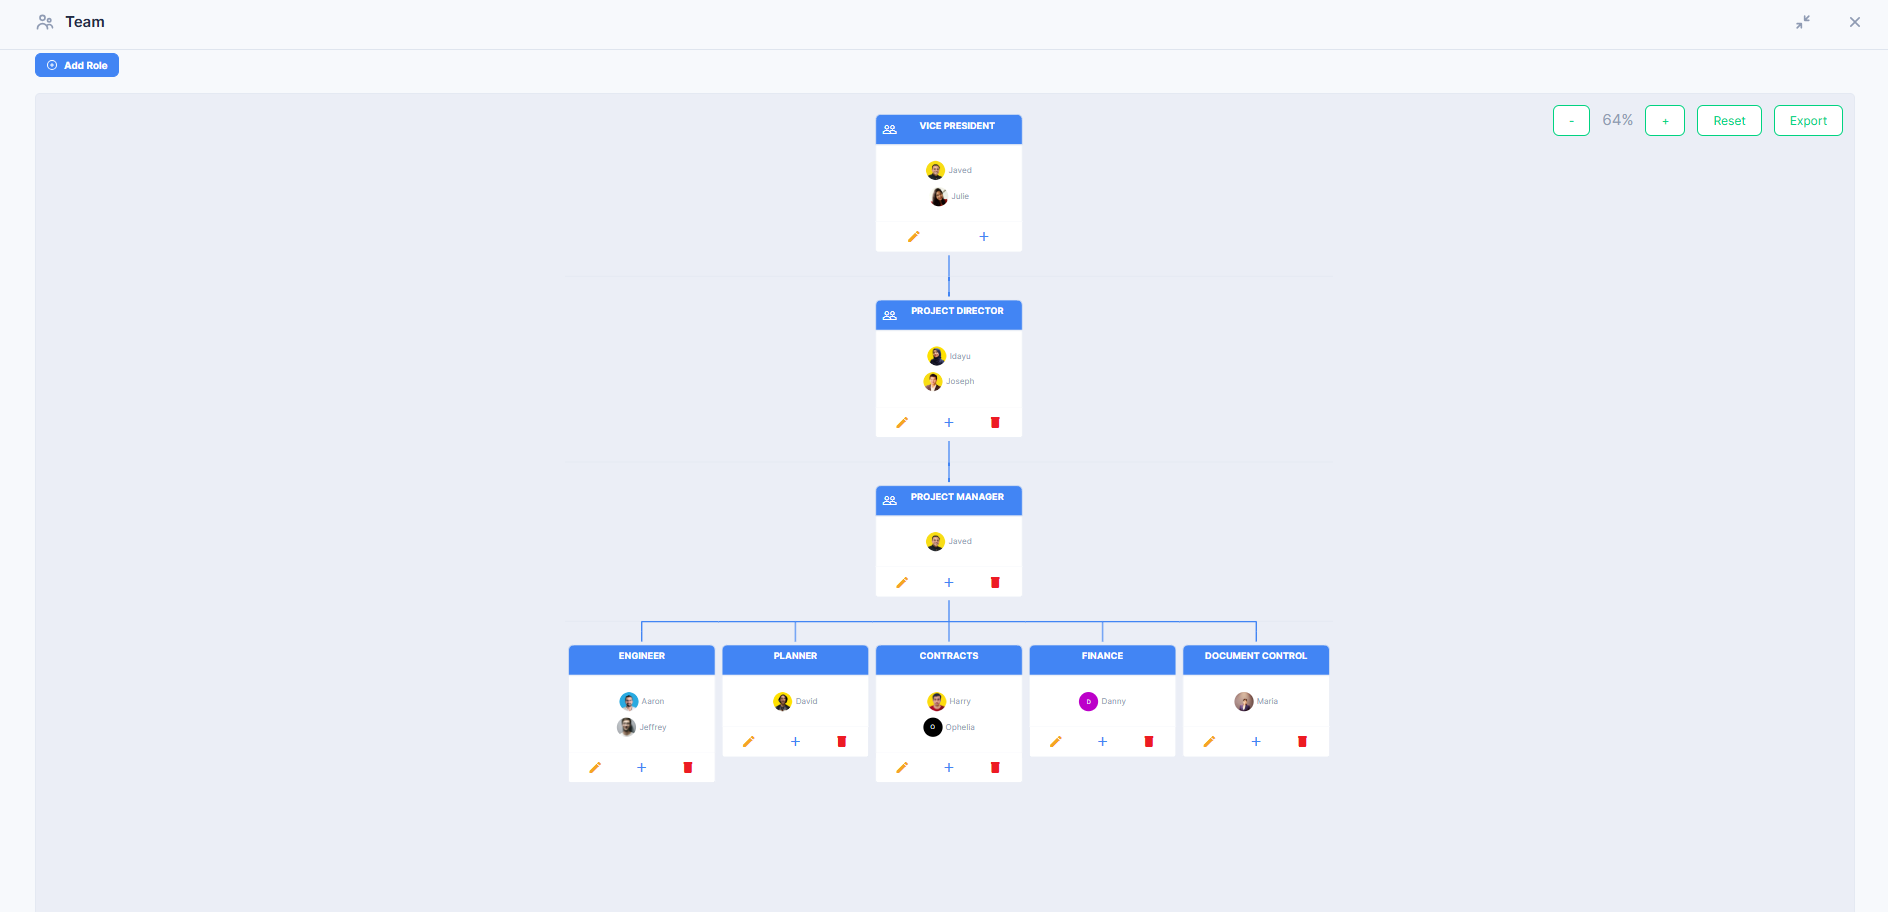
¶ Roles
The Organisation Chart shows the project team structure, viewable in two ways:
- Table of Roles — a spreadsheet-style list of every role and who's assigned to it.
- Chart — the organisation chart view, showing the same roles arranged visually by reporting structure.
Switch between the two from the toggle at the top of the Roles page. Both views show the same underlying data — pick whichever is easier for the task at hand.
- Automated based on the roadmap but editable.
- Roles are based on workflow definitions.
Role Types
- Key Role: Admins with full control of that project.
- Non-Key Role: Can view everything and update only their assigned activities.
- Assistant Role: Flag for assistant roles in the project.
Steps
- Go to Team > Roles.
- Switch between Table and Chart view using the toggle.
- Click Add Role or select an existing role to update.
- Assign users to roles.
- Adjust as needed and save changes.
Tracking team changes over time: Use Snapshot (top-right toolbar) to compare how Roles and team structure have changed between two points in time, alongside activity and phase progress. See Workflow Views.
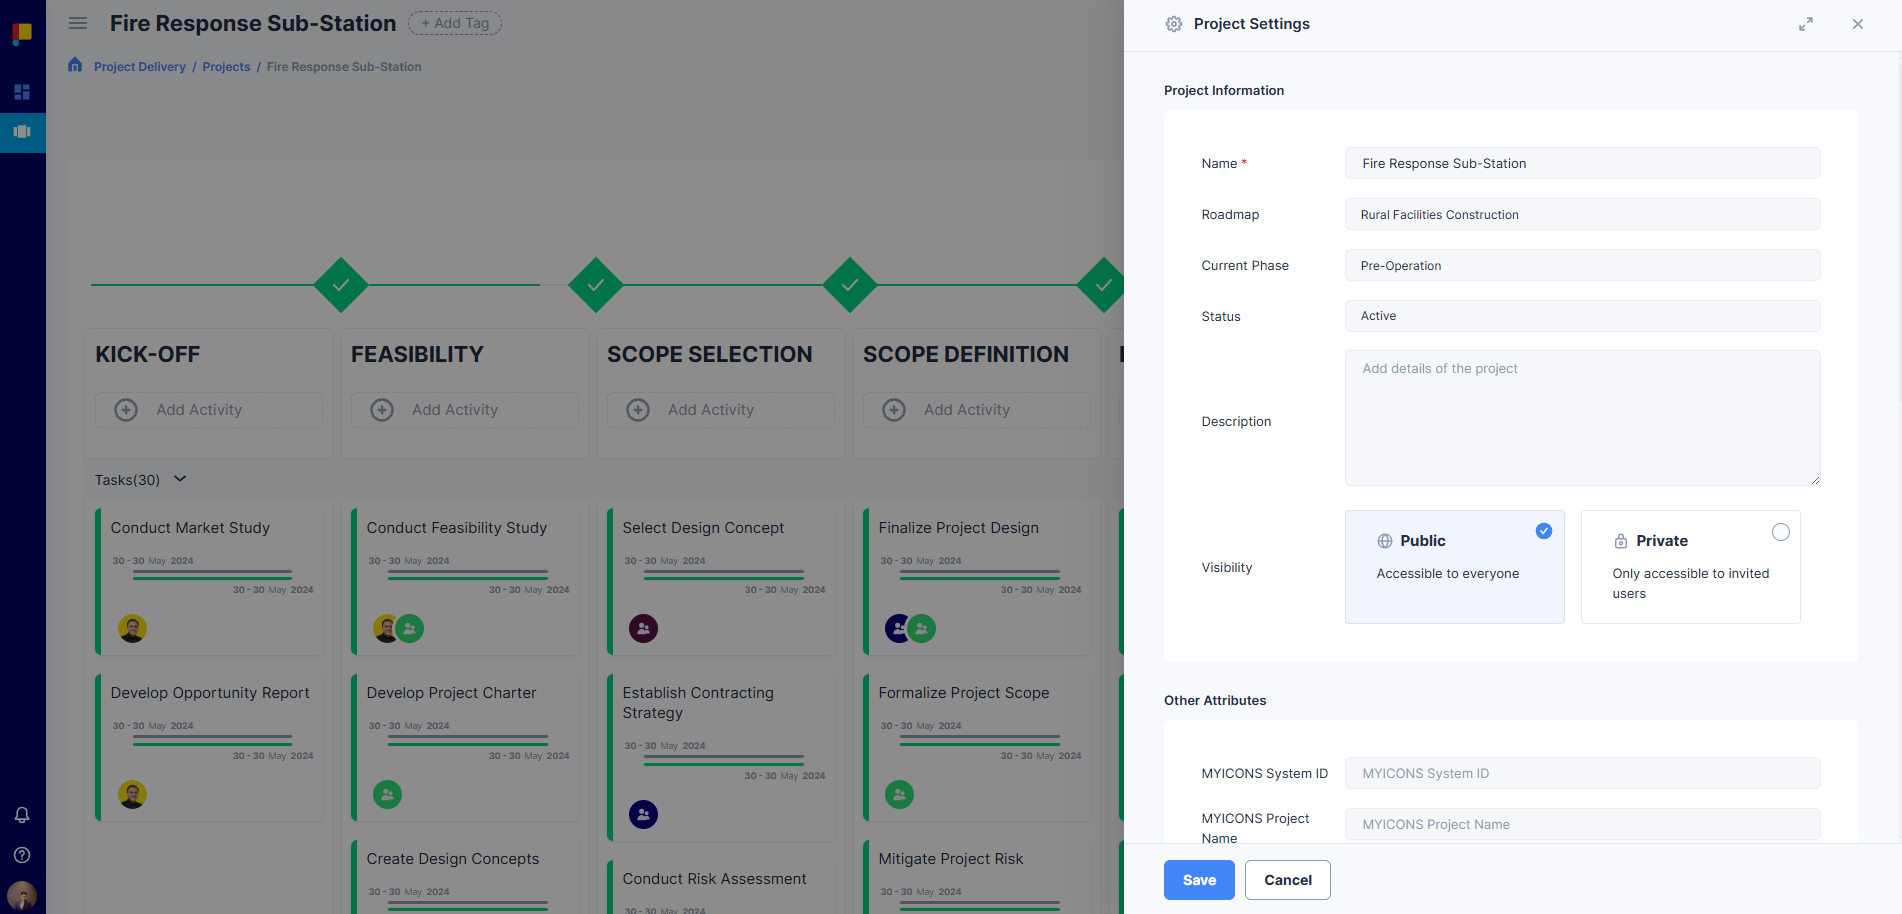
¶ Manage Settings
Settings let you update key project details without disrupting completed data.
¶ What You Can Do
- Update Name and Description.
- Change Visibility (Public or Private).
- Add or edit Tags.
- Update Current Phase.
- Change Status (Active, Inactive, Completed).
- Change Roadmap: migrates the project to the new roadmap from the current phase onwards. Completed data is not affected.
- View Other Attributes if applicable.
¶ Steps
- Open the project page.
- Click Settings in the sidebar.
- Make changes as needed.
- Click Save.
¶ Delete Project
Deleting a project permanently removes all associated data, including activities, documents, and team structure.
¶ Steps
- Open Settings for the project.
- Scroll to Delete Project.
- Type DELETE in the confirmation field.
- Click Delete.
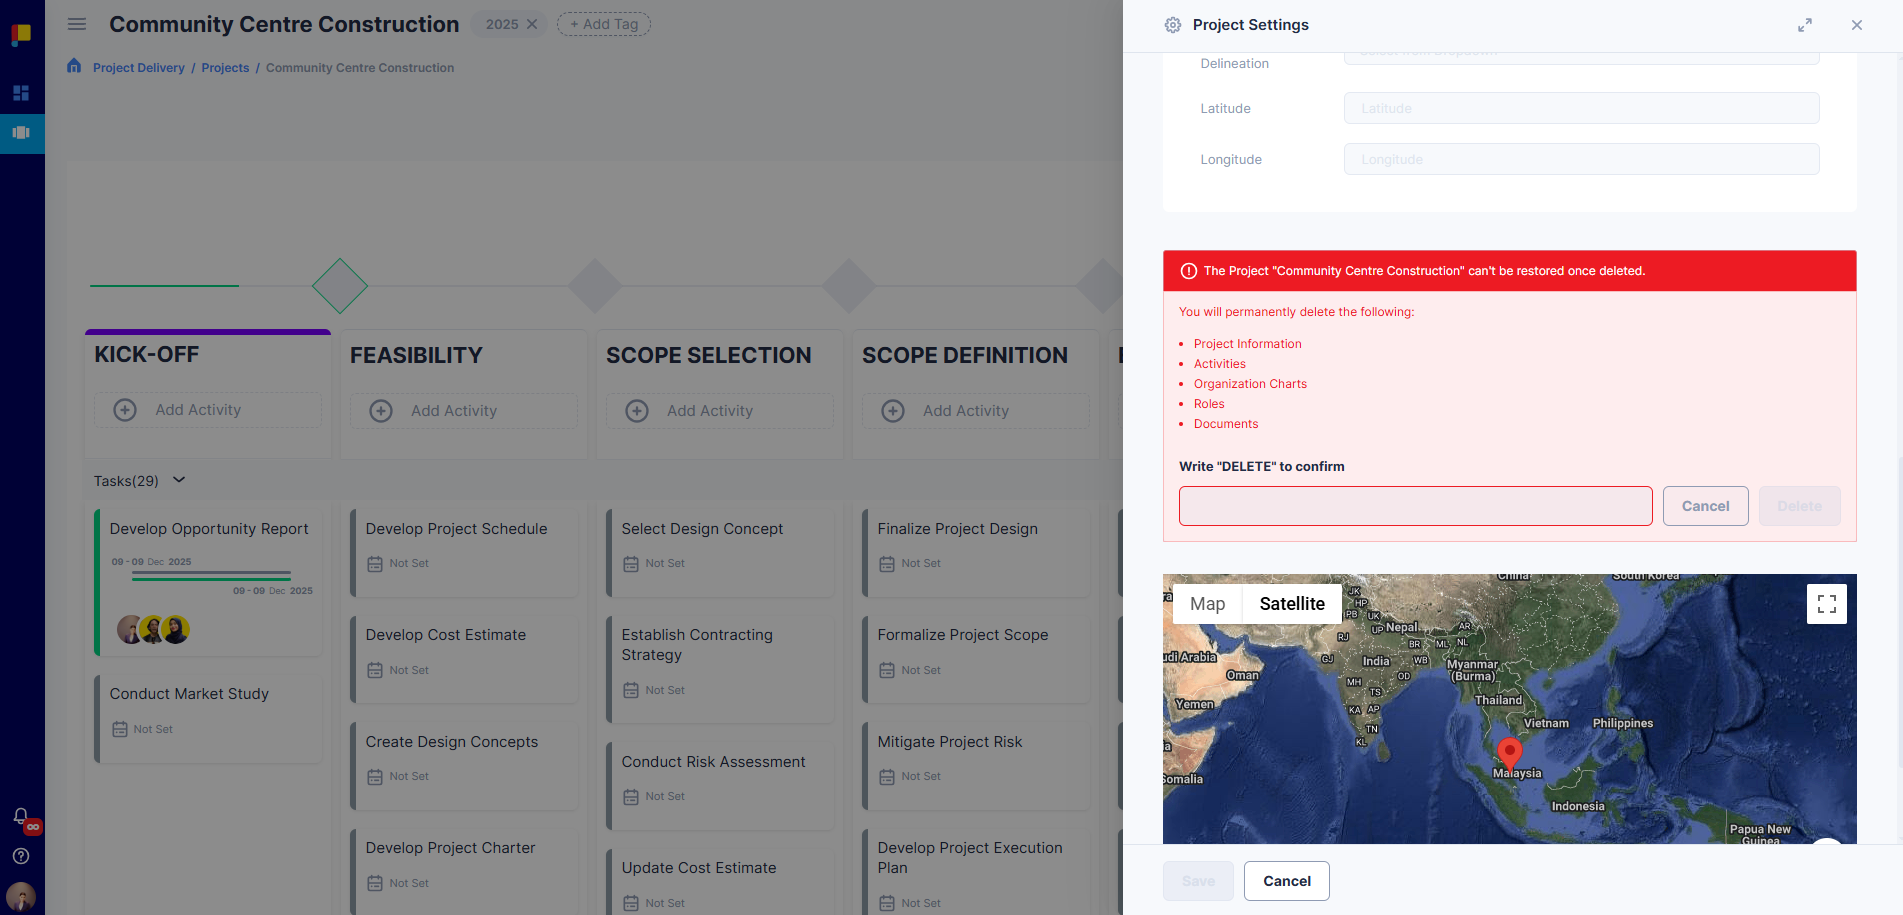
Important Notes
- This action cannot be undone.
- Ensure you have exported or archived necessary data before deletion.
¶ Best Practices
- Use tags for quick filtering and reporting.
- Assign Key Roles early to avoid access bottlenecks.
- Regularly review team structure for accuracy, and use Snapshot to track changes to it over time.
- Update your project phase and activities promptly for accurate dashboards.
- Complete activities and use decision gates to maintain governance.